Category Archives: Uncategorized

Storybird: a Great Way to Train your Imagination

Getting started

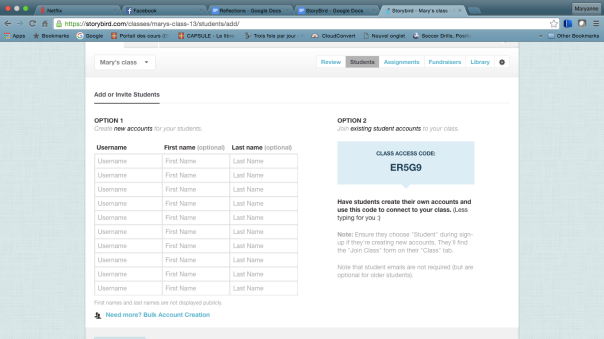
Storybird is an awesome website that allows you to use images created by artists from around word to invent stories. In order to do so, you first need to register for free on the website. You can select the reason why you use Storybird: if you are an artist, a teacher, someone who uses it for fun, etc. When registered as a teacher, you can create a classroom and add you students. This does not require an email address for the student, as ot will be a “kids account”. You can create the accounts yourself from your own account. They can also register themselves without an email address if they check “Student” when registering. If you choose to make them register by themselves, they can join your classroom with the code provided on the teacher’s account.

Screen Shot 2016-04-24 at 5.05.47 PM

How it works

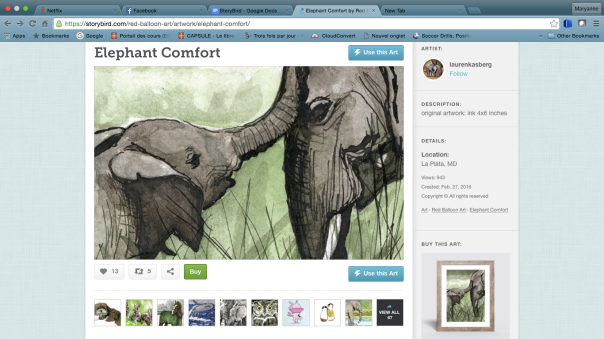
Storybird has an incredible artwork bank. It has every style of you can imagine: paint, aquarelle, pastel, pencil drawing etc. You can search something in particular through the search bar, for example : I searched “Elephant” and 101 artwork with elephants, 66 longform books, 11405 picture books and 2 people appeared. Everything was related to elephants. When you click on a picture, it opens with all the related information. On the right hand of the screen, you have the name of the artist who created it, where they are from and some information about the original artwork. You also have the option to follow the artist. Below the picture, you have the all other works from this professional. If you want to use this picture, you can click on the lighting bolt icon situated in the middle if the picture and choose what you want to do between a longform book, a picture book and a poem.

Screen Shot 2016-04-24 at 7.18.00 PMScreen Shot 2016-04-24 at 7.48.25 PM

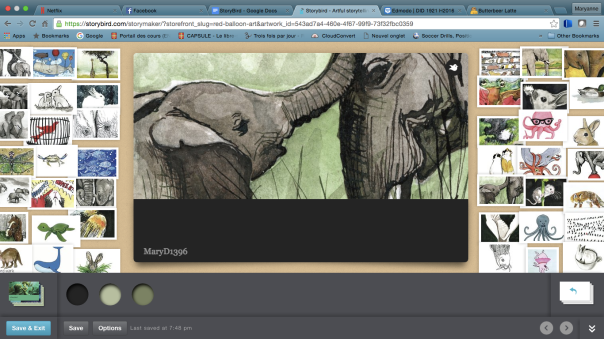
When you open the image in the creating platform, you have the cover page of your book in the center,  surrounding it are all the other artworks from the artist. You can search through them by dragging them around. You can also drag any image from there to your book to change the picture or you can also do so by clicking the picture on your cover page or the icon on the top right of the picture. The longform book is more like a book with chapters where you can write long texts but add less pictures, and the picture book is where you can add pictures to every page but have less space for text. They both function the same way as described above.

For the poems, you have the picture you chose in the middle and surrounding it are random words. All you have to do to create your poem is drag to desired words on the picture. You cannot add your words. Since I found it odd not to be able to write my own words, I did some research. Here is what Storybird says about this :

Storybird is about creative constraints. We purposefully trim away dozens of features to keep you focused and having fun as you write stories or make poems. So we don’t offer art uploads or text input for poems as a way to make the app surprising and inventive.  By imposing these constraints, your brain creates connections and ideas that you otherwise wouldn’t have. And that’s cool.”

Screen Shot 2016-04-24 at 9.08.55 PMYou can refresh the words you have with the icon on the bottom right but that will also change the words you have added to your picture. You can also change the picture if for whatever reason you don’t like it anymore.

When you are done with your creation, you can save and quit if you didn’t finish your longform book or your picture book. You can also publish them when you are done. For poems, you can publish it privately or publicly on the website, there is no save button.

Storybird can also be used as a reading surface. You have access to every story that what publicly published, their are thousand of books and poems of any kind. you can browse them by category and read them for free. People can comment and “heart” books. The reading platform is very simple and ergonomic.

You can even get your books professionally printed. A hardcover starts at 29.99$ while a softcover is only 12.59$

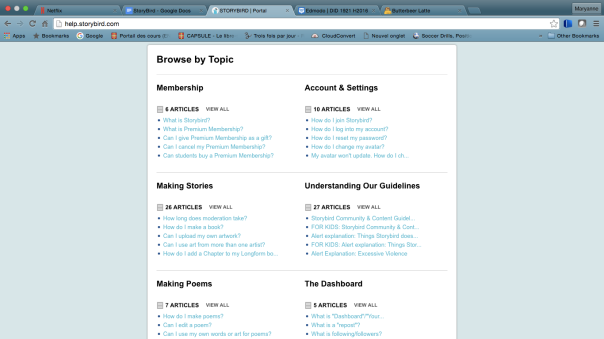
While doing my research pertaining to the poems, I found the Help/FAQ page, where Storybird answers the most commonly asked questions, divided by subject, such as Memberships, making poems, Educator/students, parents, etc. This very useful page pretty much answers any question you can possibly have. It’s a very good resource for parents, teachers and students. It can also help you use Storybird to its full potential.

Screen Shot 2016-04-24 at 10.13.23 PM

Use in ESL classroom

Storybird has so many potential, It would take me hours to write about everything you can do with it.For instance, you could do an Alphabet book with elementary school students. A picture for every letter of the alphabet and a small description of the chosen word. For example, Airplane for A, Banana’s for B, etc. For this, the Picture book would be chosen as it allows to add many pictures and short texts. It can also easily be used to teach new vocabulary in an ESL classroom for elementary school students. It could be a very interesting way to engage the students and make their vocabulary list more interesting to learn. Storybird could also be great for secondary school  ESL students to do writing compositions has it can engage their creative writing. Students could choose their own pictures to write on create a story around it. The whole class could also have the same image to write on. Volunteers could then read their story aloud. It could be very interesting to see what different ideas came up. Another great project with elementary school would be create a class story book. Each student would create a story in English, at the end, they are all gathered in the same book that they could publish and print. For the reading aspect, Storybird could be used on iPads for the reading period. Students can browse a story of the “picture book” type, as they are shorter, and can quickly read them during the allowed time. While reading some teacher reviews, I found a great idea published by Diane C. on Graphite.Org, she says: 

Some of my colleagues (4th grade teachers) are using it with their students. Each student has their own account. The teacher poses a challenge, students search for the artwork to meet that challenge, and then write the story.
I think it could make great homework, to propose a small challenge they have to complete during the week. Such as writing a short story about elephants, in the simple past. Or writing a story about an astronaut using puns. The possibilities and endless !

All in all, I find Storybird to be an amazing tool to use in class, I would definitely have no problem using it. I think many awesome projects can be created that engage children’s imagination, one of their greatest tool. I find it very versatile and simple to use. I strongly recommend Storybird.

Wideo: Introducing animated video in ESL classroom

What is Wideo?fb-image

Animated videos are accessible to everyone, making them simple to use in our everyday lives. As said in a video on Toole.com:

Animated videos are everywhere these days. You can find them in websites, social networks, blogs and emails. They increase interest and sale conversion. You too can capture and engage your audience without spending tones of money or times. […] Introducing Wideo, the most intuitive and easy to use tool out there to create animated videos online. With Wideo, you can achieve professional videos, even without any previous training.

Wideo was founded by Agu De Marco and Agus Esperon in 2012. Initially, the idea of an animated video tool was from Agu, but the whole project really started with the help of Agus’ idea of creating a simple tool that enables people without previous knowledge or training to create quality online videos

How to use it?

wideo_photo_1
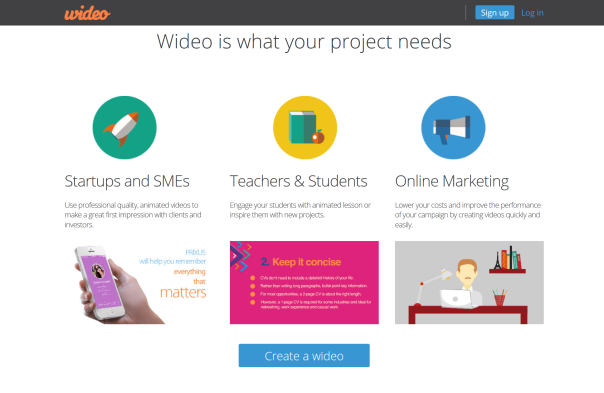
Wideo is basically a website that allows the creation of animated videos. In order to use it, you simply have to create an account, but without an internet access, the website is pretty much useless. But since we are in 2016, the internet accessibility is a problem for no one.

Users can choose (or upload their own) images, backgrounds, and sounds in order to create their own personalized video. That video can then be shared on social networks or embedded in websites or blogs. Wideo provides its users with a library of elements, objects, and fonts. Users can drag-and-drop elements into place in the Wideo editor then set the sequence of animations within their specific scenes. Each element can be re-used and the timing of the animation of each image can be individually adjusted.

Wikipedia

Everything works on a template system that you can give life through a series of presettings and predefined animations. You will be able to use an imposing image bank and evidence provided by Wideo, but you can also add your own by uploading them on the platform. Quite playful, you will thus be able to combine and animate images, text, videos and music.

here is a short video of 44 seconds on how to use Wideo: https://youtu.be/VlnLbOgPcdU

My experience

My final impression of Wideo went beyond what I have first expected. The tool enables you to do so many thing and everything is clearly explained in short tutorials on the website. On the other hand, I only experimented the free version and the complete version offers way more options, which could make it a bit harder to comprehend and assimilate. Since I only did a quick overview of the paid version, I am not giving my opinion on it. wideo_photo_3_001


First I signed up and had to choose which trial I wanted to use. After choosing the free version that only let us create 30 seconds videos, I had to select my profession. The hope page was full of templates and keywords of specific types of templates. Everything was neat and simple, so I did not have much difficulties to find my way through the website. Here is a photo of how I discovered Wideo for the first time, explaining everything that I had to do in order to create my own “wideo”. Unfortunately, I lost my wideo due to a virus in my computer, but still, the photo represents well the ease I had while creating my wideo.

wideo_photo_4

Use as an ESL teacher

Wideo is an excellent tool for making videos
to communicate your ideas in an easy and intuitive way!

-Gerry Garbulsky, Professor of El Mundo de las Ideas

Wideo offers many possible uses in the world of education. It could be used as a great tool for making creative animated presentations. It can be used by teachers to make small video clips that should foster students’ attention. Whether to create a tutorial illustrate a concept or new materials of a course in a presentation. It could also be the main tool used for online educational courses. Since the students need a lot more support and information than in regular classes, the animated videos could be used as virtual classes and could help students who are more visual and need an interactive teaching method rather than a task-based method in order to succeed and understand the lessons.

On the Wideo blog, many tips were given by teachers on how Wideo could be used in ESL classrooms. Here are some interesting ones, which I totally recommend to teachers in primary schools and teachers who give online lessons:

  1. Motivate your students. Learners are more motivated to interact with educational content when it’s narrative or storytelling! Turn your teaching content into a story, plan it out and animate it.

  2. Encourage their Social skills – Share. Allowing students to create their own online video and sharing it with their friends and fam as part of their classroom experience, builds social skills. One of the most effective ways to learn something is to teach it to others!

  3. Reach all learning styles. Make your classroom well balanced! Video combines visual and auditory stimuli into one single package. Spreading things out across different styles, and creating short animated movies will address the naturally diverse nature of students’ methods for soaking up info through media.


Conclusion

Personally, if I had to create animated videos with any tools available for free, I would still use the full version of Wideo. Only with the free version, the possibilities are countless , so for a teacher, paying for a good tool that is simple and education is priceless. Its simplicity and its variety of functionalities makes it the best website for ESL teachers in need of safe and interactive tools to use in their classroom. Even though the full version is 228$/year, Wideo is worth the price. In my opinion, the tool can be used in almost any context related to ESL teaching and i definitely would use it in my classroom.

by Justine Fournier-Brassard

Laval University

VideoScribe, an interesting alternative to regular education

VideoScribe (http://www.videoscribe.co/) is a downloadable software that may be used to produce interactive videos. This tool has been developed by Sparkol, an English company based in Bristol, that specializes in video editing softwares. Created in 2012, VideoScribe is mainly designed for “all designers, graphic artists, marketers and bloggers”, but can obviously be used in the education system as well. According to Make Money on a Computer,

“VideoScribe […] is a comprehensive video animation software program. […] the company has been at the forefront of this highly popular method of animated marketing”


In this blog post, I will state the main characteristics and my personal impressions of the software after trying the 7-days free trial edition. I will also elaborate on possible uses of VideoScribe in a classroom environment.

Main characteristics

First, since VideoScribe is a software and not an application of some sort (yet), a download on a computer is required. As of now, March 24th 2016, VideoScribe for Android is a project that is in development and may be offered in a near future. Once the program is downloaded and the subscription to both VideoScribe and Sparkol done, you may use the software. For new users, like me (and probably you), a short tutorial video of a little over 2 minutes showing the basics of the program can be found on VideoScribe’s home page after downloading the platform. Also, VideoScribe has a Youtube channel (https://www.youtube.com/user/VideoScribetv) on which users and curious internauts can find additional and longer tutorials elaborating a bit more on more complex aspects of the software.

Once everything is installed, it is possible to start a new project. The way VideoScribe works is that the user can place images, writings and music on a canvas and the software will automatically generate a video of what is found on the board. In the video, images and writings are drawn on the board in the same order that the elements were placed in the timeline. The timeline is found at the bottom of the screen during elaboration and can be modified by the user whenever he/she wishes. Images can be found in a bank of over 500 pictures, but the number of available images may get bigger if you pay for a subscription. It is possible to import additional images, but the drawing during the video will not seem as natural as those that are offered by the software. There is also an important selection of short songs that can be used for the video. It is possible to import your own MP3 files as well, and you can record your voice over the video, which can be an interesting feature for educational purposes. For an example of some of those features, here is an example of what I quickly did with VideoScribe. Unfortunately, WordPress doesn’t support VideoScribe’s exported file since “.scribe” is not a common extension.

Impressions and use in education

My first thought on this interactive platform was that it looked attractive.  As Stacey Roshan, the NAIS “teacher of the future”, explains:

“That combination of handwriting with visuals, plus voiceover and light audio track, is powerful. Using VideoScribe enables me to do this type of work with ease, all animated to look quite professional.”

Like it or not, the first thing that leaves an impression is the look of something or someone, and VideoScribe is appealing by its colors and design. The use of visuals in a classroom, especially in ESL classes, is a major asset. The products are esthetically appealing to both the eyes and the ears, which is great to get students’ attention.But my second thought was “would I really use that in a classroom other than for a one-time thing?”. Well, the thing is that using the platform only once would not bring up its full potential. Using videos like this in class would not be  very practical, since pausing every now and then to answer possible questions on the theory would break the momentum of the videos. Creating videos using an interactive tool like VideoScribe, though, allows teachers to make a bank of useful activities and also allows everyone to benefit from a possible flipped classroom. By putting some efforts in the creation of many videos, a teacher could gather all of them on a webpage accessible by students from anywhere they want. This way, students could watch and listen to the theory at home as part of a homework and the teacher could focus a lot more on particular details and problems common to some students. VideoScribe also looks good and is quite easy to use. Opinions vary about this software, though. Jeff Lewis, from Student Centered Technology, explains:

With technology in education, I am primarily concerned with tools that will allow my students to communicate, create, and express themselves, and after making this short video, I think videoscribe may be too much for third graders.

Even if things look good and entertaining, it doesn’t mean that it is effective. In fact, in order to have students learn the most, it is important to keep it simple. Especially for younger students that tend to be fascinated by anything that is out of the ordinary, animations, music, and voiceovers may take the attention away from the main point of the video, which is the vocabulary or anything that is highlighted by the presentation.

The price range is also something that needs to be considered. It is possible to subscribe to a 7-day free trial, but more time will be necessary in order to create a good number of videos. A monthly subscription is 29 USD per month, which may be expensive on the long term for teachers and schools alike, but a yearly subscription is 144 USD, which is 12$ a month, which seems to be reasonable. Nevertheless, getting the money to pay for VideoScribe is not always possible and easy, depending on the school and the socio-economical area you teach in. Otherwise, it may be a good investment if you feel comfortable using the flipped classroom and interactive video softwares.

Jing: Sharing Made Easy


Jing is a downloadable software jing2from TechSmith which allows its users to record or capture whatever is going on on their computer screens. Furthermore, this tool provides various editing tools which allow one to provide meaning or focus to selected content. Various different sharing options are made available to the user, making Jing a useful tool for everyone.


Research


Not much more can be said when being presented the image below. It explains what the tool can do, in terms of three simple short sentences which illustrate the mindset of the Jing tool itself: simplicity.

download_jing_for_freeAccording to the author of the article entitled Techsmith Jing review, Steve Horton, there are various advantages to using Jing, including its simplicity. One of these advantages is stated in one of his quotes below. 

It’s nice that the recipient doesn’t have to be registered with Jing, as it doesn’t use its own social network or chat service. Just paste the link wherever and go.

– Steve Horton

 However, this author also mentioned a downside to Jing which is that images one captures using the Jing tool cannot be embedded as image, but must rather be shared. This might cause trouble depending on the user’s intention for using the application. 

Nonetheless, according to another article entitled Jing- Screenshot & Screencast Software, there aren’t any significant downsides to the Jing tool. The authors of this site did mention some upsides to using Jing, such as seen in the quote below.

This is a great feature for teachers wanting to add notes on top of images or text, or want to indicate something to their students.

– EdTechReview (ETR)


This statement leads to the idea that this downloadable tool does have useful pedagogical applications.


Personal Experimentation


While experimenting with the free, downloadable version of this tool, I did not encounter any problems which was pleasantly surprising! Downloading the application was easy all all instructions were clear as can be seen in this Video I created by using the Jing tool itself.

After downloading the tool, I came across a four-minute tutorial video that explained pretty much everything about the tool. This video left me without further questions while usually tutorial videos lead me to have much more questions.

While capturing an image or recording a video, no problems were encountered as the directions were easy to follow and the editing tools were clearly presented. As seen in the picture below, editing tools in relation to adding arrows, adding textboxes, adding a frame to a captured image, highlighting words in the captured image of a text, and changing the color of the tools are available to the user.

There were a few important things that I noted about Jing while experimenting with it:

1 – Although video recording in the free version of Jing are limited to 5 minutes in length, there is nothing preventing a user to make different segments of the same screen display in order to get a longer recording time.

2 – As seen at the bottom of the image below, Jing works in coordination to Snagit, another tool provided by TechSmith which provides further editing tools.

3 – Jing does not only allow one to record Internet content but anything and everything that appears on a computer screen can be recorded, annotated, and shared.

4 – Screencast, another tool also provided by TechSmith, makes sharing videos easy by generating a URL or an embedded link to your video. It is important to note that Screencast does not modify the content of your videos.

Canoe Trip


Pedagogical Applications


Jing provides various pedagogical applications that can enhance learning development. First of all, as Jing allows teaches to easily share information, students can have easy access to class lessons or course material at any time and anywhere. A teacher who presents particular course material on the computer can easily send a recorded segment of the lesson to the students who can review the material at home, as many times as needed.

Secondly, as Jing allows one to present a selected area from the computer screen, a teacher can provide focus on one particular thing on the screen while removing distractions such as advertisements. In doing so, one can safely share Internet content with the students in class. 

Thirdly, Jing facilitates the sharing of course material among teachers themselves. This can help teachers develop interesting new lessons for the students while allowing them to share ideas and activities that they have proudly created and presented in their own classrooms. Furthermore, when using the annotations while capturing images or recording videos with Jing, a teacher could provide a substitute teacher with relevant information in relation to the course material needed to be presented.

Fourthly, the editing tools in Jing allow a teacher to provide explanations for online content. One can add captions, use arrows to point to an element of interest, and use different colors to identify different aspects. This is a wonderful application for the classroom as not only do it can help clarify information for all of the students, it allows students who are more visual to follow easily.

riaaaqqxtLastly, this tool can be presented to the students who could be asked to complete an assignment or activity through the use of this tool. This can be helpful to introducing new technology to the students while making them aware of different online applications.


ESL Teaching Applications


Although Jing can be useful in the ESL classrooms for the same reasons previously mentioned, it can be further used for the completion of particular ESL projects or ESL activities by the students. An example of such a project could be asking students to create a video presentation on how to use an online application tool.

At first, the teacher could present the Jing tool and give students time to play around with it. One could even present the Jing tool through a video recording of how to use the tool itself!

Then, the teacher could ask the ESL to choose an online application tool that they find of interest and have them research English information about it and experiment with it.

Once this is done, the students could be asked to create a video recording of their own in which they present the tool they researched about and experimented with.

The students could be asked to record their own voices in English in order to describe what is happening on the screen while they record the video. This could be useful for the teacher to evaluate the students’ oral proficiency while making the activity stimulating, entertaining, and educational for all. This also can reduce some of the anxiety felt by students when ask to present orally in English in front of their peers.


Conclusion


sunAll in all, Jing is an easy to use tool that allows its users to easily annotate content and share it with anyone online. It provides interesting applications for any type of classroom as well as for ESL teaching in particular. Jing makes sharing content easy, all you have to do is click on the sun on top of your computer screen and you are ready to go!


Mélanie Lalonde, an ESL teacher in training from Laval University


Adobe Captive: A Captivating eLearning Software

As explained on Adobe’s blog, the infinite access to knowledge via the Internet as well as the advent of new technologies led to an increased in popularity of the idea of flipped classroom. The concept first came up as research in education and psychology showed that students learn better when they are engaged, whether it takes the form of interactions or carrying out activities and projects.

“The resonant message is that teachers should focus on the advantage they are gaining in creating more time for engagement in class by improving the efficiency of content delivery out of class.”

Adobe

There are, hence, several ways to set a classroom thats follows the principles of the flipped classroom but basically students have to “learn” at home, and “practice” in class.

“The advantage of this approach is that students are able to ‘practice’ and ‘reflect’ with a teacher close by, so they are more likely to practice collaboration, creative problem solving and effective communication – all skills that are in ever-increasing demand in today’s workplaces.”

Adobe

Why use Adobe Captivate in ESL classroom? Because of all the advantages of flipping the classroom!

What is it?

Adobe Captive 9 is a software from Adobe which allows creation of responsive eLearning which is why it is one of the best tools out there to create online materials. Th is, due to its most recent update, Adobe Captivate can now be viewed on any screen on any device (Windows and Mac!).

“From storyboarding to responsive eLearning, create virtually any kind of professional looking and instructionally sound content using a single tool. Add interactive elements to transform static content with just a few clicks. Call on the power-packed functionalities from within an intuitive UI that makes authoring easy and efficient.”

Adobe

Adobe Captivate surpasses its fellow software Adobe Presenter which a simple tool that brings PowerPoints to life by turning them into videos with voice-overs and that creates quizzes. However, Captive has more to it, in that it also records the screen and allows you to create “branched scenarios”. Branched scenarios as defined by Articulate, are learning situations in which students have to exercise critical judgement– the third intellectual cross-curricular competency in the MELS’ high school program.

“Adobe Captivate Prime includes a player that adds a whole new dimension of interactivity to online training courses. It supports virtually any multimedia, ranging from standard videos and PDFs to SCORM-compliant content.”

eLearning Industry

When getting Adobe Captivate Prime, Adobe accounts turn into a LMS in which teachers can see students’ grades, give them feedback, track their collaborative work and encourage them.

How does it work?

“Since we bought Captivate the production of our department has increased 400%. It’s not even a joke. Courses that took 1 month to create in Flash before takes perhaps a week or so in Captivate.”

CP Guru

Although Adobe sells its software as easy to use, there are numerous courses offered to help one get familiar with it. Which made me wonder, is it really that hard to use?

This slideshow requires JavaScript.

Even if the software looks similar to PowerPoint in many ways, it has numerous other features which are in fact easy to use. The hardest part is moving and timing everything how you want it. The software offers the option of video capture, but it does not allow for simultaneous voice-over which made it rather difficult to time voice-over without having any idea of what is going on in the video capture. I also tried the quiz/knowledge-testing feature which is really, really simple to use and fun! You can choose which and how many types of questions you want and the slides are automatically created, you simply have to type the question and answers and choose the correct answer (there can be more than one).

“Recommendations to others considering Adobe Captivate:

Get a good tutorial or pay for professional development for those who will be designing with it.”

Alex R.

However, no matter how easy it was, it was quite time-consuming (I guess less than other more basic options) and there was no way to publish the final product to Youtube or to export it as a readable video. I went through several help websites but all the proposed methodologies were undoable (the option was not there, I could not convert the file online, etc.) Therefore, I worked for about two hours on a product that I cannot show (which may be because I have the trial version of the software).  

“Among all eLearning development tools, Adobe Captivate has been the market leader for many years, though others have been nipping at its heels. Despite the fact that similar tools offer many of the same features, there’s no question that Captivate has more features than any of the others, leading to more freedom to implement your instructional design needs. That said, any tool can be made more feature-rich. The trouble is, when those features are poorly implemented, the tool becomes difficult to use.”

Learning Solutions Mag

A pedagogical ESL tool?

“Educators are developing ways to personalize learning, using technologies such as video, digital simulations, and computer games. However, unless the traditional teaching model is altered, technologies such as these will have limited effects. One alternative model gaining attention and advocates is called Flipped Learning.”

Iconic

It is easy to see how the eLearning content could be related to the MELS’ five broad areas of learning (BALs): health and well-being, personal and career planning, environmental awareness and consumers rights and responsibilities, media literacy and citizenship and community life, thus fosters engaging learning situations. Such lessons would be much more personalized and hence meaningful to the students which would lead to more participation from the students, the ultimate goal in ESL classrooms. Adobe Captivate as a LMS would definitely help teachers increase students’ level of engagement and motivation which is often lacking. Students in the core program often do not the interest in learning a second language, and personalizing the MELS’ content and creating short and intriguing videos, would assuredly ultimately encourage learning.

“I use this to develop courses”  –Zifang Su 2013

“creates all my short tutorials and is 508 [classes ressourcesCompliant…”  –Debra Robinson 2013

“Increased use to develop E-Learning resources”  –Mark Rollins 2013

Content-based projects conjointly done in either science, history or geography would link BALs: a how to eat healthy program to create, what the 3Rs are and how to implement them in one’s daily life, a careers unit, people’s rights around the world and through history. Short videos could be created to teach students the materials and they could work on such projects in class.

The tool offers great features to monitor their learning such as pre-tests– which can even allow students to listen to the appropriate answer or sends him or her back to the incorrect content, and games– where students can test their knowledge in a fun way. These features could certainly be used in any classroom by weaker students, students who missed a class or students who are not sure of a concept. As in any other classes, ESL teachers have to deal with students with language or learning difficulties and such a tool allows for a more individualized teaching (There is even a closed captioning option!) due to the increased level of time spent on practicing.

Adobe Captivate is an expensive and hard to use software that can really make in teaching a flipped classroom. Flipping an ESL classroom would certainly allow more learning and better acquisition.

Laurence Leclerc, first year BEALS student


Super Snagit

What is Snagit?

img_snagit-icon.png Snagit is a powerful screen capture tool that captures audio output as well as video display. This screenshot program helps individuals transform the way they communicate with images and videos. Snagit can capture any image and create videos of your computer screen. With Snagit, users can additionally enhance these images or videos with multiple of its different effects. As a matter of fact, it replaces the native print screen function with supplementary features. As stated by screen-capture-software-review.toptenreviews.com, Snagit offers to its users the widest and best variety of capture methods available. This powerful screen capture software was launched by an American company called TechSmith Corporation that specializes in screencasting tools. The screencasting tools developed by TechSmith include recording, screen capture, and editing software for both Mac and Microsoft. The company was founded in 1987 by a man named William Hamilton. As techsmith.com states, the company aims at ensuring that “the process of creating, sharing and collaborating around content is simple and intuitive so that others can learn from their knowledge.” In 1990, the company created Snagit, which is their best-selling product. This video and image capture tool is very powerful, but also very easy to use. This is why Snagit has been released in English, German, Korean, and Japanese. Indeed, many different people across the globe have used Snagit at work and at home. In addition, Snagit is especially useful at school, where both teachers and students can use it for many different reasons!


What can Snagit do?

Snagit is a powerful tool that can do many different and useful things. It can easily capture images and videos of your screen, mark up your screenshots, and so much more. First of all, Snagit is a software that individuals need to purchase before using. Currently, the software sells for $49,95 and the upgrade for $24,95. However, Snagit also offers volume prices to its users. It also offers a free 15 day trail. Snagit can take screenshot of your screen. You simply need to press the Snagit button on your screen and click “New Capture” to drag which section of your screen that you want to take a picture of. Simply grab the horizontal, vertical, or entire scrolling area with just a click. Snagit-CaptureAnything-1.pngBy clicking on the Snagit button, you can also capture a video, window, web page, menu, and webcam image. You can additionally open your Snagit editor or connect with your mobile device. Once the capture is taken, users can then do many different things. Indeed, you can personalize your images with graphics with the Snagit accessories, add effects like borders, shadows, and perspectives to your entire screen capture with the special effects, and quickly document steps and workflows with the step tool. This means that you can comment over screenshots using text boxes, point out your ideas with arrows and shapes, and highlight key areas.Snagit-MarkUp.png

Next, you can also use Snagit to capture videos. Simply capture your screen as if you were taking an image but instead, press the video. After this, you can easily record your video as well as your voice. You can additionally get rid of any unwanted sections of your recordings and hide all the video controls. Such a video lets the person watching the video actually hear your actions and your voice as you are interacting on your screen. As download.cnet.com states, “It’s a perfect tool for anyone who regularly compiles tutorials or creates reviews of Web sites or software.” After capturing your image and recording your video, you can now send, save, or share your masterpiece. Indeed, within the Snagit editor, you can save the images and videos as a PDF, PNG, GIF and much more. You can also directly sent your document using Google Drive, Microsoft Word, and so on. It is also possible to share the images or videos via email or instant messages.

Using Snagit in English second language classrooms

To begin, an English second language (ESL) teacher can use Snagit in many different ways and for many different reasons. As stated by edshelf.com,

“Snagit gives you all the tools you need to create eye-catching images and videos for easy sharing. Customize Snagit to meet your specific needs or the needs of your entire organization.”

For example, if a students has difficulties pronouncing certain sounds, the teacher could create a small video for the students to listen over and over again. The student could then listen and practice the sound using the teacher’s video and improve his or her pronunciation. This could help the child throughout their entire language learning process and help them reach some of their goals.  In addition, instead of making a simple and boring document to explain a project, teachers could use Snagit to make the project come to life! In fact, making a video could make the project much more interactive, fun, and easy to understand. Teachers could add notes, bullets, drawings, and websites to their documents. They could then print these fun and engaging documents  or send them electronically.snagit_edu_handouts.png

Lastly, ESL teachers could also use Snagit to narrate feedback. They could indeed use this software to correct students’ assignments and texts by highlighting, commenting, posting bubbles, and drawing. Students will love to hear their teacher’s voice as they explain their mistakes. They will also enjoy the personalized feedback. This might also be simpler for teachers and better for the environment since they don’t have to print all of their students’ copies.
snagit_edu_grading.png

However, students may find Snagit a bit more difficult to use than teachers. This is why Snagit could mostly be beneficial for the teachers to use. There are still, however, come activities that students could do using this software.First of all, they could use Snagit to present a website or activity and describe it throughout a video. They could use Snagit at home or at school to record their assignment. Obviously, this would only apply to more advance and older students. The teacher could simply choose an article or text online for them to read. Then, using Snagit, students could simply record themselves as they read and as they comment the article and analyze it. This would be an excellent activity for teachers to evaluate their students’ oral skills as well as reading skills.

My experiences using Snagit

Overall, I have greatly enjoyed using this software. Indeed, from the moment that I first downloaded it, I could see how easy and simple it was to use. It took me more or less 15 minutes to understand its main features and different possibilities. This is why I believe Snagit is so easy to use. I think I have greatly created and learned from this software. I am looking forward to using it in the future.

Screen Shot 2016-04-14 at 13.18.56.png

In addition to the many images that I altered using Snagit, I also recorded a short video. Just like the images, this video was very easy and enjoyable to make. I simply followed the steps. Also, one of the reasons why I found that Snagit was so easy was probably its multiple tutorials. Indeed, when first using the software, Snagit suggests many different tutorials that users can watch to better use the software. I greatly enjoyed this software and would definitely use it if it wasn’t so expensive. Throughout my experiences with this software, I could definitely see that it was of good quality. However, I don’t think that its worth spending that amount of money. All in all, I think Snagit is superb tool, especially in ESL classrooms.


Chloé Roberge – ESL students


Snagit: Introducing Flipped Learning to the Classroom

What is it?

Launched in 1990 by software company, Tech Smith, Snagit allows its users to make screen captures of images and videos, as seen on their computer screen, and add recording effects, image editing, and narration.

How does it work?

Users must first download the application to their web browser. Once downloaded, users must double-click on the Snagit icon and wait until the capture profile window appears. Users can then change the settings to capture videos or images and decide whether they wish to record in a full screen mode or if they wish to record only a selected part of their screen.

Once the recording mode has been activated by clicking the red icon of the recording interface, a white circle appears to confirm the area of the screen to be recorded.

Recording can then begin. Some users decide to create an outline or full script prior to their recording to assure full speech fluency to their videos.

Once recording is done, the video uploads directly into the Snagit editor where users can trim and add effects. By clicking on the “tool” tab on the toolbar, users can add lines, arrows, stamps, shapes, and various labels. Additionally, by clicking on the “image” tab, users can crop, cut out, trim, rotate, and resize. They can also wish to add borders, effects, zooms, and filters to their video.

13054361_1289275677768455_1685875962_o.png.jpeg

Once users are completely satisfied with the final product, they can choose to share it on Youtube or simply upload it to their computer in a MP4 format. This can be done simply by clicking on the “share” tab on the toolbar and selecting through which media the videos is to be shared.

Here is an example of a tutorial that I created to explain to students how to have access to their weekly schedule on Université Laval’s portal, CAPSULE:

Pedagogic use

Snagit offers multiple possibilities for pedagogic use in an ESL classroom.

First, ESL teachers can create engaging videos for their students by incorporating narration and special effects. This feature, along with the trimming feature, allows teachers to personalize content that has already been created to better meet the needs of their students, thus allowing for a great time-saver, as teachers are not obliged to create all provided content. Indeed, it permits teachers to save valuable time, which can then be spent focusing on other content or simply reviewing parts of the content that seem to be more problematic and difficult to understand. In a similar thought of mind, videos can also be shared amongst staff members, allowing others to benefit and reuse such videos as well.

Similarly, by using the screen capture features provided by Snagit, teachers can create how-to tutorials (see personal example above) for their students when exploring new websites and applications. Indeed, when introducing new platforms to the classroom, students can often get confused, especially those who lack computer skills. In order to lower students’ anxiety concerning the use of new applications, teachers can build tutorials with a step-by-step procedure to explain how the application works. Students can therefore refer back to such videos at all times, thus ensuring teachers that students understand the tasks at hand.

snagit_edu_grading
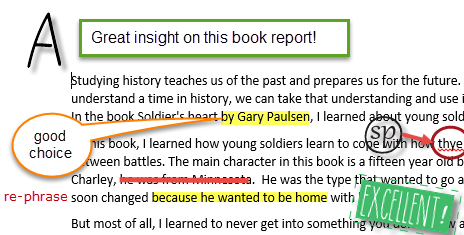
Second, teachers can use the application for grading students’ assignments by using its drawing tools, stamps, and callout features. Teachers can therefore highlight or cross out certain passages in the students’ writing compositions, add corrections in the margins, and use the callout features previously mentionned to add comments. Adding narration to their assignments also allows them to fully comprehend the teacher’s corrections, which can be considered as an important time-saver, as it prevents teachers from having to use valuable class time to answer students’ questions.

snagit_edu_handouts.png
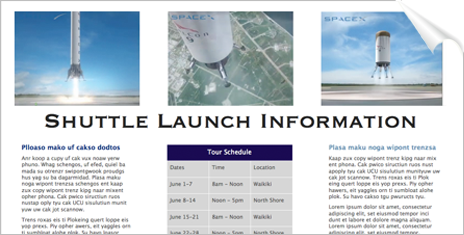
Third, the application encourages teachers to build creative and engaging handouts for their students. By scanning their documents to their computer and using material already provided on the Internet, teachers can combine content to form handouts which can then be transferred directly into programs such as Word, Powerpoint, and Google Drive. Once integrated to these formats, teachers can print out or share their handouts electronically, thus allowing students to have access to complete documents combining content from multiple sources.

Fourth, by sharing these videos, ESL teachers can maximize students’ comprehension of the content, as they can rewatch all videos as many times as they wish. This allows students to progress at their own learning rate, and thus counter the learning gaps between students. This also maximizes their comprehension of certain concepts by providing visual support to the teacher’s explanations.

On the other hand, students could also directly benefit from the application themselves, as Snagit offers an interesting alternative to traditional oral presentations. Indeed, rather than having live stand-up presentations in front of the class, students could create their own presentation on Snagit using the narrative feature provided by the interface. The recording feature therefore allows students to have concrete examples of what they did good and what has to be improved, as they can refer back to their video after recieving their teacher’s or peers’ feedback. This method also helps counter problems related to students’ anxiety, which can often interfere with the students’ performance in front of the class.

All in all, Snagit encourages teachers to experience the benefits of flipped learning in their classrooms by using its platform. A step-by-step procedure explaining how teachers can flip their classrooms using the application is also available on the website.

My opinion as a future ESL teacher

Snagit may seem a little overwhelming at first, especially for users who have very limited computer skills. Yet, after navigating the platform and using the tutorials made available by the administrators, users can easily overcome such difficulties.

Indeed, as stated by Kirsten Buck, review producer who ranked Snagit as the number one screen capture software on TopTenReviews:

The software’s tutorials are extremely informative, walking you through each capture method step by step.

Additionally, as stated by inside sales specialst at TechSmith, Megan Carnaghi, Snagit can be easily accessed by all its users:

Not only does Snagit make it easy for you to deliver content, it also makes it incredibly easy and convenient for students to access it. Students can view the Snagit video on their home computers, laptops, tablets, mobile devices, etc. As long as your students have internet access, they can view the content anywhere, anytime, and on any device. –Megan Carnaghi, inside sales specialist at TechSmith.

Pricing also makes the application quite accessible to its users. Prices vary, whether the platform is used for personal and professional, educational, or governmental purposes. Education discounts and education volume pricing are also available for teachers who are interested in purchasing the application.

All in all, in light of what has been previously mentionned, I would defintately use Snagit for educational purposes. According to me, by using interactive, creative, and engaging videos, I could easily stimulate and encourage students to participate more acitvely in class. Moreover, allowing my students to use the application could increase their motivation and interest in school assignments and tasks.

Therefore, as a future ESL teacher, I would recommend the use of Snagit for educational purposes due to the numerous benefits it provides teachers and students with.

Plus, a free 15-day trial of the application is offered, so there is no reason not to give it a try!


Caroline Dallaire-Vallée, TESL student at Université Laval.

Articulate Storyline

Articulate storyline is complete software which allows users to create interactive internet content.  Though it is quite complicated, learning how to use the basic functions of Articulate Storyline is very simple, because when you open the software, you do not have to look for the tutorials; they are right here in front of you. If you’ve read my other blogs, you’ll know how good I am with computers. That’s why I decided to watch and read all of the tutorials, a long process that ultimately granted me a pretty good understanding of how the software works. If you do not want to watch all of the tutorials, I would recommend watching and reading the following tutorials: Getting Started with Articulate Storyline: Overview, Creating Your First Slide, Creating Interactive Slides, and Building Quizzes and Result Slides.

First of all to create a new slide, you need to click on the “New Project” button, which is located at the top left of the screen. Doing so will get yo
u to a screen with a small blue outlined square.

Once you get there, the first thing you need to do is to double click
on the blue outlined square at the middle of the screen. You will then be able to edit your first slide. From there, you will find that the layout looks a lot like the Office suite. Most schools have the Office suite, and their students usually arestoryline.png used to working with it. This is thus an advantage because the students will learn to use the tool faster. School-aged children are
usually very good with technology, which is why I would only recommend teaching them the basics before letting them explore the tool by themselves. However, I would be careful when using this tool with students. Articulate storyline, just like the well-known software Microsoft Power Point, has a lot of creative features such as animations, transitions, color choices, ect. Though this allows for a lot of flexibility with the look of the presentation. Some students may get carried away and spend too much time working on these things rather than focusing on the content of their presentation. This is why it is essential to teach students the basics of how to effectively design a presentation before getting them started on Articulate Storyline.

Articulate storyline covers all of Microsoft Power Point’s basic functions (inserting text, images, animation, videos…), but lets you do so much more. In this quick overview, I will be covering my four favorite functions. These four functions are illustrated in the presentation I made. (This is a screenshot version, I had problems putting the presentation online)

The first is adding a voiceover. All you need to do to use this function is to click on insert, then click on the audio button, and select “Record Mic…” Upon doing this, a new window will appear, and all you have to do is press on the red button to start recording. I could see a lot of applications for this function, but the most interesting one, in my opinion, would be to have cripplingly shy students record their oral presentation instead of doing it in front of the whole class. Oral presentations are often a big part of evaluating competency 1: to interact orally in English. Though some could argue that oral presentations in front of the whole class have their benefits and that giving a good presentation is a skill the students need to learn, it can sometimes be helpful to evaluate speech without having stress be a factor. Sachiko Aoki also points out that voice recording can give students an opportunity to practice speaking English outside of class, while also being sure to receive feedback.

The second is creating an interactive presentation. By adding controls (buttons, sliders, ect.) to the presentation and by adding triggers (see the getting started video) you can create an interactive presentation. The tool allows for the controls to control the presentation in many ways. Clicking he controls can change the slide, reveal a new layer, or control the emotions and movements of characters. This is quite complicated, so I am going to let you look at the tutorial instead of spelling it out here. This feature can have a lot of applications in the classroom. In her blog, Jyothi Sita gives examples of how the interactive aspect of Articulate storyline can help teach conceptUntitleds to students. (The slides she gives as example are way nicer than what I could ever do, so I’ll put a picture of one of them somewhere around here.) Another  of them could be to have students create an interactive presentation to inform their peers about a topic. These presentations could then be shared with the rest of the class for everybody to learn something new. This would be a great way to make learning more fun, since, according to Harold M. Horowitz, “Students’ apparent interest and attentiveness while course material was presented tended to decrease during pure lectures”. This means that such a project would help students stay more attentive to the subject matter, because of the interactivity of such a teaching method. In an ESL class, such a project could help evaluate student’s ability to write in English.

The third is creating quizzes . Creating quizzes is made easy by the fact that the software provides you with a quiz template. All you need to do is click on “new slide” and select the quizzing tab. You then choose a type of quiz, and you’re good to go. From there, you can modify the template to your liking. This could be used in class to, obviously, create revision quizzes for your students, but also to ask your students to create their own revision quizzes to share with their classmates. This way, instead of having just one quiz to revi
ew with, students can review with as many quizzes as there are students in your class.

The fourth is recording your screen. Doing it is very simple. Just click on “insert”, then on “new slide” then choose the “screen recordings” tab. You now just have to click on “record your screen” From there, follow the instructions to record your screen. What is great about Articulate storyline is that the screen recording is only one slide, so in can easily be inserted into an stooooooooooory
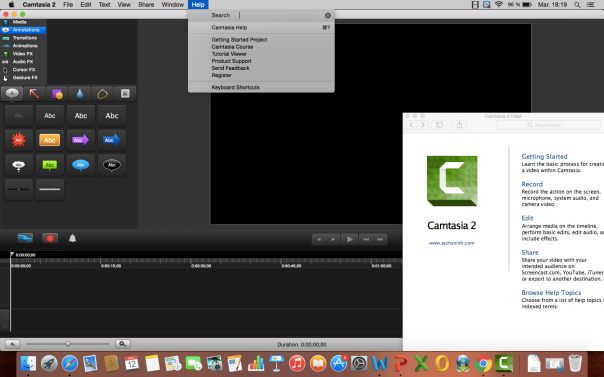
interactive presentation. This could be used in class to teach students how to use a particularly complicated software. With older students, you could also have a team of students using the screen capture function to teach their peers (and the teacher) how to use an internet tool.

To conclude, I would recommend Articulate Storyline to any teacher who wanted  Granted, with a price tag of 559$, Articulate Storyline can seem pretty costly. However, I would argue that because of its versatility, Articulate Storyline is a good investment. Articulate Storyline can help create simple power points, quizzes, or interactive presentations, as well as recording voiceovers. It can thus have many applications in the English classroom. However, because the tool is quite complex, I would not recommend it for elementary school students who are still getting acquainted with the simpler presentation creating softwares such as Microsoft PowerPoint. I would really recommend making sure that my students are well acquainted with PowerPoint before I introduced them to Articulate Storyline, because trying the software, I really felt like my experience with PowerPoint helped me use the tool.


Improve your teaching methods with Screencast-o-Matic

You are tired of traditional oral presentation and you want to spice up your classroom? Your students are bored and you want to have them more involved? I have the solution for you, and it is called Screencast-o-Matic.

What is it?

Screencast-o-Matic is a recording website where one can record and then share whatever he or she wants. It is used by more than millions of people and approximately 30,000 recordings are made every day on this Screencast-o-Matic. This website is free, but you can upgrade to the pro version for 15$.

How does it work?

First, you will have to log in using you e-mail address. Then, you will have to click on the start recording icon to begin. You will have to download the recorder launcher in order to record yourself. After that, a recorder controls menu will appear on your screen. You have the possibility to record your screen, webcam or both. With the free version, you can record for a maximum of 15 minutes. You can move and modify the size of the screen during the recording by clicking on the size icon your record controls. The recorder will automatically use the default mic on your computer, but you can select a specific mic clicking on the narration icon on your record controls. After you have adjusted everything and are ready to record, just click on the record button to start. You can pause, resume, preview and restart the recorder. When you are finished, you just have to click on done and a new window will appear where you will have to choose to save the recording as a video file, to upload to Screencast-o-Matic or to upload to Youtube

123456789

My opinion as a future ESL teacher?

Screencast-o-Matic is a fun and technological website where both students and teachers have the opportunity to create original and new activities. It is a fun and innovative way to have your students involve in ESL classrooms.

With Screencast-o-Matic, you can ask your students to record a radio show. In teams, each student is responsible of a subject. One talks about music, another one about the news, another one about sports, etc. After they finished, they send it to you and you can listen to it alone or show everybody’s work to the whole class. It changes the traditional oral presentation to a more and fun way. This is a good opportunity for shy students to show their C1 competency, since most of them make a lot of mistakes while talking to the whole class, as they would not usually due to stress.

Also, you could ask students to write a story and then record them using Screencast-o-Matic. This will enhance their creativity by writing an original and fun story and they will have a chance to record themselves and hear their own story.

To active students’ prior knowledge, teachers could use Screencast-o-Matic to record something that students already saw in class and make them guess what it is. It is an original and fun pre-activity. While students are listening to your voice, the teacher has more possibility to circulate around the classroom. This is an innovative way to start a new topic in a classroom. You can also record instructions that are said daily, such as Remember to speak in English. While students are doing an activity in pairs or in teams, the teacher’s focus is mostly on students’ questions and he or she does not always have the time to remind students to speak in English. This is a great alternative and students may develop a habit of speaking English.

Furthermore, students could do a review on a software or a website they tried out. This would enhance students’ critical judgment and argumentation. Students could also give peer feedback to their teammates. This would help them to see what is good in their argumentation text and what needs improvement. Also, this could prepare secondary 5 students since they need to write an argumentation text for the MELS exam at the end of their third and last term.

In conclusion, I would definitely use Screencast-o-Matic in my ESL classes. I think it would interest students since we can do tons of activity on this site. When I was in secondary 5, I recorded a radio show for my English class and I thought it was original since we could do it on the subject we wanted. This is an activity that I really enjoyed and I am sure that my future students will enjoy it as much as I did.

Camtasia

What Is Camtasia ?

Camtasia is a powerful screen casting tool created by the software designing company TechSmith. Camtasia allows its users to create videos and tutorial by making a video with screencast. According to blogs.techsmith.com, “Screencasting is when you record a video of your computer screen, oftentimes for teaching or sharing ideas.”. Additionally, Camtasia is not only a screen casting tool, but also a filming ancamtasia-dl-imaged editing tool.

How does it work ? My experience with Camtasia

As mentioned above, Camtasia has many functions. First, its main function is screencasting. But I discovered that, with Camtasia, I could also film and edit my videos. Moreover, I could add my voice over my videos and use many other tools to enhance my projects.

To begin, after I had downloaded the app from techsmith.fr, I opened it and immediately a tutorial started. The tutorial was quite complete, and gave me enough information on Camtasia to start my project right away. The tutorial was interactive and very interesting, it allowed me to explore many tools in Camtasia and become a little bit more familiar with it.

What I found interesting about this tool is that it can multi-task. I could start recording my screencast, video or voice, or all 3 at the same, by just clicking on the red button and at the left and choose the options I wanted to record with. Therefore, I could screencast my computer for the future viewers to see, I could also film myself and record my voice to narrate my video. Obviously, I can choose only one or two out of the three options. The fact that Camtasia can multi-task is very useful, it makes it easier than doing all three things separately and combining them at the end.3mmtemps

After, when I was done recording, I just had to click on the little red icon on my top menu bar, and choose “Stop Recording”. Immediately after stopping the recording, my video was directly in Camtasia, ready to edit. It was also added to the “timeline”, at the bottom of the screen in Camtasia.

stop

Another interesting fact about this screen casting tool is that if I need help, for basically any feature in Camtasia, I just have to right click on the tool I have trouble with for example, the “timeline”, and choose “timeline tutorials” to access tutorials that will further explain how I can use the feature I clicked on.

Camtasia provides a fully feature editor to improve your videos. After, screen casting my video was directly in the editing tool. With the editing tool, I could delete some sections or parts of my video if I was not satisfied with them. Moreover, I could also zoom into parts that were more important in my video. I could also add images and other recordings to my screencast.

When I was completely done with my video, I could share it directly from Camtasia. I just had to click on “Share” in the top menu bar and choose where I wanted to share my screencast.

If you need further help in understanding Camtasia and its many features, you can always go in the “Help Menu”, choose “Tutorial viewer” where you can find videos, articles and even a Camtasia course.

help

Here is a short video I made to show a few features of Camtasia. The video was completely done and edited with the Camtasia software.

video begins at 0:14

https://goo.gl/8Gr8DA

You can also find a very complete review of Camtasia on PCworld.com, they are experts in tools like Camtasia and explain many of the new features that you can find in the new and upgraded version of Camtasia.

“Camtasia Studio version 8 is a major step up in easy-to-create interactive videos. The results can be quite stunning even for non-professional users” – PCworld.com

My Opinion on Camtasia

In my opinion, Camtasia is one of the most complete tool to do all kinds of video editing. I had never done any screen casting before, but Camtasia has so many features to help me in my project that, even if I was a beginner, I was able to complete my little project. I would definitely recommend this tool to anyone looking for a screen casting, or a video editing tool.

Moreover, I agree with Toptenreviews.com who argues that “The software is difficult to learn”. This awesome tool can definitely become confusing for some beginners. It has many features, many options to it, which can be complicated for some people beginning with screen casting.

“With more editing tools than any other software on our lineup and excellent online tutorials to boot, Camtasia is one of the best video capture software choices available.”Toptenreviews.com

Finally, another little downside to consider before using Camtasia, is its price. Currently selling for CAD$397,37 for the PC version, and the Mac version which is CAD$131,57. However the Mac version is not as complete as the PC one. Nevertheless, Camtasia is quite expensive, however taking into account its many features and the professional results you can easily get with this tool, I still strongly recommend it. I agree with the verdict of PCadvisor.co.uk about Camtasia.

“Simply the best screen-capture program there is, Camtasia Studio 8 adds a host of functions, features and media assets to an already great program. Camtasia Studio could be your screen capture program, multimedia project creator and video editor. It’s easy to use, has masses of features, and represents decent value – if you will use all of its many facets.”PCadvisor.co.uk

Possible uses of Camtasia for the Language Classroom

There are many ways Camtasia could be used in a language classroom. For example, students could record themselves reading a text on their computers and screencast at the same time the text. Or, simply record themselves, make a video of them talking or reading a text they wrote, etc. This could be useful for shy students who won’t be as overwhelmed as when they are in front of the class doing an oral presentation.

Another activity would be that students could present their favorite websites. They would screencast themselves exploring their favorite website, reviewing it and describing why it is their favorite. After, all the students’ videos could be posted on a blog like this one, for the other students to have access to it. This activity could be done with higher level students like in grade 4 or 5 secondary.

Finally, one could get inspired by Andrew Vanden Heuvel, who teaches AP physics and astronomy at the Michigan Virtual School. This teacher records all his classes by video recording himself and uses screen casting to explain projects or give examples to his students on what they have to do.

“Students routinely say that the most helpful items in the course are the Camtasia videos that I upload. I use these videos to show how to solve a challenging problem, to demonstrate the use of an online simulation, or to introduce a new concept in an engaging way.”– Andrew Vanden Heuvel – techsmith.com

Lastly, online classroom allows the students to benefit from an individual path. In fact, not all students have the same learning pace, even in the tradition classroom some students would want the lessons to go slower and some would want it to go faster. With online classrooms, it is possible for all students to respect their learning pace. In my opinion, every language teacher could take advantage of Andrew Vanden Heuvel’s experience and help their students with screen casting, and online teaching with Camtasia.

“The power of the online classroom is that every student can proceed at their own pace. This changes my role as a teacher to one who supports each student individually as they progress.” – Andrew Vanden Heuvel – techsmith.com

Lisa-Marie Deschênes – ESL student


Jing: the Discrete, but Impressive Software

What is Jing?

Jing is a software created by Techsmith, a company that creates tools to improve communication and collaboration within companies or schools. Jing allows its users to easily capture an image or video of their computer screen. Its low profile design is easily accessible on your computer and could be considered more as an addition to the toolbar of a the webpage than a software itself. According to PC advisor,a website created by the UK’s leading technology media company that gives indepths review and informations about all sorts of technology,

“Jing is an interesting free screen capture application that definitely fills a void in the marketplace.”

My experience with Jing

I got a little bit scared when I realised I had to actually download this software on my computer. I don’t know why but, I thought that installing a software on my computer would mean a complicated and long process to master how to use it. I was wrong. Jing is probably one of the easiest and most straightforward tool I have ever used in my life. The longest part of my exploration of Jing was actually the installation of it on my laptop which did not take long. It then took me approximately 2 minutes to figure out how it worked. When Jing is installed on your computer, a little sun-like figure appears in the upper-middle part of your screen. Three modes appear when you direct your cursor on the figure : capture, history and more. Capture is where you want to head to. Another cursor will help you select to part of your screen that you want to focus on. Then, you can select whether you want to  an image screenshot or a video screenshot and you are ready to start your work. It’s that simple.

My idea of Jing in an ESL classroom

Teachers could use Jing on many occasions in their classroom. They could ask their students to narrate a video in order to practise their out loud reading or they could simply use the cursor selection to have the students focus on a certain part of the screen. According to EdTechReview, a website that help users use and learn about educational technology,

“Jing is a great feature for teachers wanting to add notes on top of images or text, or want to indicate something to their students.”

My idea for an ESL project using Jing would be a narrated video. As a future teacher, I would use Jing as the final step of a creative redaction project. I would ask the students to write a story.  It could also be an informative text on an animal or an historic figure. Then, students could draw pictures or find a good number of them on the web and create a Powerpoint with their story or short text written on it. Jing would allow them to select their presentation with the cursor and recored themselves reading their story. They would still be in control of the pace at which the picture would change, allowing them full control of their presentation. To adapt this activity to advanced or High School students, the teachers could ask them to use the same template but for a movie or application review. This activity would be along the lines of the C1 and C3 of the Mels curriculum for ESL classes. For the purpose of this blog post, I took a story on the internet. Here is the website where I took my story from. Here is an example of my project.

Finally, Jing is an excellent tool for a fast and easy specific screenshot. It could also help anyone with technical difficulties to clearly explain their problem to someone else. However, Jing is also a software that open many doors to creative projects in ESL classroom or that can help teachers target specific information while teaching with a computer screen projected on the board. All in all, I think Jing is one of many free tools available that teachers should try in order to conduct new, interesting, and modern activities in their classroom.

Sceencast-O-Matic: Showing Students Even More


As technology advances, teachers have to try to adapt their ways of teaching in a way thattéléchargement allows the inclusion of different technological tools to keep classes interesting and up to date. With these new tools come new concepts that may be difficult to grasp for some, such as the idea of “screen-casting”.

First of all, what is screencasting? According to TechSmith Blog, “Screencasting is when you record a video of your computer screen, oftentimes for teaching or sharing ideas”. So basically, screencasting is when you film what is going on on your computer screen, usually as the user is speaking or explaining what is being done on this same screen. There are several online tools, such as Screencast-O-Matic, that provide free, as well as pro versions of a screen recorder.

Screencast-O-Matic has a free version (the one I checked out) and a “pro version” that costs 13$/year. To use this website, the user must register, but only an e-mail address is required to do so. Next, the user must download Screencast-O-Matic to their computer so that they do not need Internet connexion to use the tool. Once the downloading is complete, the user is ready to begin making their videos! The free version offers three different options for screencasting. The first version is the one records what is going on in the computer screen. It can also record your voice if you have a microphone, so you can explain what you are doing to the people who are watching your video. The second version uses a webcam as a video recorder, which basically films you talking or doing something. The third and final version is a combination of the first two, which means that the recordings are of the computer screen and of what is seen on the webcam, which appears in the corner of the computer screen. This tool is very simple to use, once it is downloaded to your computer, you just have to go back to the website and click on “start recorder”. Once you click on “start recorder,” a toolbox pops up where you have recording options, such as if you want to record your voice or not. Next, the user has to determine the frame of the computer screen that they want to record. For example, the user can decide to leave out the bottom of the screen (where the “start” button is) and simply focus on the page that is open. Once that is set up, the user simply has to click on “record” and can pause the recording if necessary. The free version has a maximum recording time of 15 minutes. Once the recording is done, the video is created and downloaded to the computer or uploaded to YouTube, depending on what the user chose to do. Screencast-O-Matic can be used to explain different concepts or to create tutorials for students. Here is an example of what I could use Screencast-O-Matic in an ESL classroom for.

As I mentioned in the video I created using Screencast-O-Matic, recording what is being done on the computer screen and sharing these videos with students can be very beneficial to them, since they can revisit the information found in these videos at any given time. Moreover, this tool can be used to assign online projects to students, since it provides students with a detailed, step-by-step procedure to completing the project. As explained in my video, students could also use Screencast-O-Matic for presentations or to share projects, such as the StoryBird picture book project that was briefly explained in my trial-video. Students would have to write a story using Storybird, once the story is complete, students would have to use Screencast-O-Matic to record their virtual book as well as record the narration of the book, which would be read by them as well. Having students use Screencast-O-Matic would not be a problem, since it is very simple to use. Larry Ferlazzo, a high school teacher in Sacramento, California even said

“I thought this (Screencast-O-Matic) would be perfect to my students — some knew PowerPoint and they could teach the rest quickly, so there wouldn’t really be much new to learn — I suspect, and I ended up being correct, that it would take less than a minute for students to learn how to use Screencast-o-matic.”

This way, students would have a personal video of their creations that they will be able to share with their classmates as well as with their parents.

Moreover, Screencast-O-Matic can be very useful for flipped classrooms, where students learn about new subjects or topics at home by watching videos, and where they then come to school to practice what they have learned with their teacher’s help. Screencast-o-matic would be a great tool to use to create videos that could be sent for students to watch from home. Although creating all of your own videos can be time-consuming, at least Screencast-o-matic is very simple to use and as long as you have a microphone, the videos are fully created for you!


Amanda Houley

1st year BEALS student at Ulaval

Adobe Captivate, an Easy Tool to Flip the Classroom

With the arrival of new technologies, many innovative and creative educational possibilities are being discovered by teachers all around the world. One of these is called Flipped Classroom. It consists of having the theory recorded so the students can watch or listen to it at home while keeping the class time for activities such as teamwork project, exercise, and literary creation just to name a few. As explained by Allen Partridge:

In general, only 1/3 of that material that we include is actually necessary for the lesson. In addition to that, we usually will cover a topic in 3 or 4 parts. So 60 minutes is really 20 minutes of content, explained 3 times in different ways, and 20 minutes of content is usually actually 3 or 4, 5-7 minute short topics / subtopics. Once you realize that you can cover most lessons with 3 or 4 five minute videos (that can be replayed, rather than restated) you start to realize that even creating your videos can be a fairly simple task.

Flipped classroom could save precious classroom time for activities, but also save explanation time for both the learners and the teachers. Another important aspect of these short lesson is that some students might have fewer difficulties listening to 4 videos of 5 minutes at home than trying to focus for an entire hour in the class. There are many tools that can allow teachers to do flipped classrooms, or at least some that should be incorporated in such classes, like the use of video, screenshots, or quizzes. In the past teachers had to rely on many different programs in order to carry out flipped classrooms on a regular basis, but this laborious time is finally over with the arrival of a specific software that includes all the requirements stated above, one software to rule them all, Adobe Captivate 9.


Background
Adobe Captivate 9 was released in august 2015 by developers working for Adobe Systems Incorporated, which is an international software company based in San Jose, CA. Adobe was founded by John Warnock and Charles Geschke in 1982. Adobe Captivate first edition was actually released under the name RoboDemo and was principally used because of the FlashCam feature, a screen recording program. It was then relabeled in 2006 for Adobe Captivate 2. Adobe Captivate is a software that allows teachers to incorporate technologies in a classroom environment. It allows users to add video recording, screen recording, audio recording, quizzes, and many other features to a presentation. It is often used in a flipped classroom environment. A flipped classroom is when students are given a video made by the teacher of the theory as homework, and thus, it allows the teacher to use the time in the classroom for activities and exercise. It flips the usual class=theory and exercise=homework settings of a normal class.

This is an example of a quiz/test creation, a word search

puzzle.png
My use of the software
Adobe Captivate can seem hard to use when looking at it for the first time; there are many different options and many customization tools. But as stated by Michael from CPGuru:

The first one is the UI changes. The new Adobe Captivate 8 comes with a completely new user interface. The only thing you will recognize is the white slide in the middle – everything else is new. The team behind Adobe Captivate felt that the UI in earlier versions of Adobe Captivate was too intimidating for new users, so the new version should make it easier for newcomers to get started with Adobe Captivate.

So the interface has gotten better in the last two versions (8 and 9) and more user-friendly than it used to be. The interface is very similar to most graphic design software, like Photoshop from Adobe for example, where you can have many projects within your main project and edit different items in relation with each other. I am not the most acquainted Photoshop user, so my utilization of Adobe Captivate was not influenced by the previous use of a similar interface. But first of all, let’s talk about the installation. The software is free to use for a 30-day trial period, but then costs 30 dollars per month, or 1 099.00 dollars to buy the complete license. If you are a teacher or a student, you can have the complete license for 349.00 dollars instead. The full version of the software is not cheap to buy but is very complete. The trial version will delete projects that were created after the expiration date. The files need to be unzipped after the download, which might be complicated to some users that are not used to do it. When opening the program, many options are available to create a new project; such as software simulation, responsive project, and video demo, just to name a few. I picked software demonstration for my test, as you can see with this link. In this simulation, I show students how to create an account on Edmodo with visual support and step-by-step demonstration. I also incorporated a small quiz in the middle of the demonstration just to show that the possibility is there. I could also have added a recording of my voice while doing the demonstration if I wanted to do a flipped classroom. The simulation tool is easy to use, you click on start, it starts, and then all the things you do will be recorded on different slides for a step-by-step presentation.

On the left is the Adobe Captivate interface, and on the right is the photoshop interface

Another important feature is the responsive project option, where a project will be readjusted to different sizes depending on the device it is opened. As stated by Dr. Pooja Jaisingh:

Thankfully Adobe Captivate 8 (9) allows you to create responsive eLearning courses that can fit perfectly in different device sizes in both horizontal and vertical orientations. You can author as you always have—content will rearrange itself for the new tablet and mobile views.

For a flipped classroom, it is very important that every student is able to read the different texts or presentations sent to them. That’s why this feature on Adobe Captivate is key for teachers who want to teach using this teaching method. At home, the students don’t all have the same electronic devices, some have a mac, others have an Android tablet, and others just have a computer, so teachers need to be aware of these possibilities when planning a flipped classroom. As shown in the picture below, you can see the mobile interface, with pink color at the right, then moving to the left you have the other devices option.

Devices.png


Project and ESL use
There are many projects that students can create by using this software. One of them is to be a teacher for one lesson. Students would have to create a flipped classroom lesson in pairs. The first step would be to do a short but effective explanation of a subject of their choice, maybe 2 videos of 5 minutes, and then prepare some activities that students would have to do in the classroom afterward such as a quiz or a discussion. This would help to evaluate the oral competency of students who fear oral presentation in front of the classroom, while evaluating their individual use of the language. Since it is a video, they can do it 10 times before reaching a version they feel like is good enough for them. The follow-up activity could also be done as a homework right after the watching the video, giving students some times in class to do a more complex activity prepared by the real teacher or by the students who did the videos and the quizzes. This project is just one out of many different possibilities that flipped classroom offers. As explained by Cynthia J. Brame :

The key is that students are using class time to deepen their understanding and increase their skills at using their new knowledge.

This kind of activities, just like any flipped classroom activity, allows the student to go deeper in their knowledge of a subject and to develop competencies that would not be otherwise developed in the usual school context. The main objective of a teacher should not be to read PowerPoints for an hour, while offering no concrete activity outside the usual workbook that students find even more boring. They should instead focus on their capacity to bring students to a higher level of cognitive analysis in the classroom since many parents can’t help their children with their homework at home.
In the end, I think that flipped classroom will keep gaining popularity with the new generation of teachers over the older and more “normal” classroom teaching. Flipped classroom might not work as well with the older generations of teachers that are less skilled with the IT and the use of internet in general. I guess it should be used if t both the students and the teachers can benefit from it; if the teachers are comfortable with it, if it is not too demanding on them, or if students are interested at all in flipped classroom are all factors that can influence the use of this method of teaching. All in all, I think that Adobe Captivate is a great tool, costly, but very complete when used at its full potential. I would recommend this tool to any teacher who feels like he/she can teach in a flipped classroom setting and who wants a very thorough instrument to help him/her to carry this task.

Snagit: Easy to Use Screen Capture Tool

What is Snagit?

Snagit is a screen capture software created by TechSmith. The software enables you to take pictures or videos of your screen and to do basic editing on your screen captures .

According to Kirsten Buck, “Snagit is the best screen capture software on the market because it combines some of the best capturing and editing features in an easy-to-use program.”

How does Snagit work?

snagit capturing
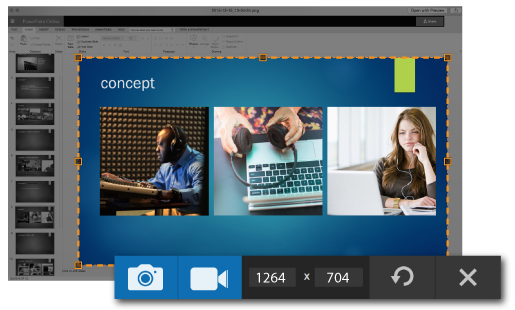
Snagit needs to be downloaded on your computer. You can either create an account or connect with your Google account, which is great to save you some time. As soon as the program is installed, you have a tool bar that opens on top of your computer screen which lets you get started with screen captures. Snagit is also linked to your Print Screen button which facilitates things for you since you only have to click on Print Screen to then select what you want to capture on your screen. If your press on Print Screen using Snagit, the software allows you to select the part of the screen you want to capture either with a photo or a video. Then, once your capture is done, the Snagit Editor opens for you and let you modify your screen capture and save it or share it. Here are some examples of what you can do with this software:

snagit capture

Snagit in the ESL classroom

Snagit is an awesome tool when it comes to teaching in general, but in ESL teaching as well. It can be used for many different purposes. A great way to incorporate the software in ESL teaching would be with flipped classrooms. Through the screen captures, the teacher could make simple videos with narration explaining different grammar points to his or her students for example. The students would get in touch with the new grammar outside of class, and would do exercises to understand and practice the same grammar point in class. This  way, the teacher would be there to help answer their questions. Another way to use Snagit in the classroom would be to help students with particular struggle areas they might encounter. For example, if a “weaker” students do not understand a notion that was seen in class, he or she could write an e-mail to the teacher, who could then send a video that explains the notion or a particular assignment better to the student. A third way to incorporate Snagit in the ESL classroom would be for students to do video reviews. They could try to find a video of interest to them, then decide on what they want to comment, and finally do a screen capture of the video with themselves narrating their comments and everything. This could be an interesting way to evaluate oral production since students should not feel anxiety as much if they are talking alone in front of their computer and have the possibility of starting over again if ever they need to compared to the typical oral presentation in front of the entire class..

My opinion

Snagit is really easy to use. I first downloaded the software and started to look at its feature without watching a tutorial before doing so. As soon as you start using Snagit, you have different tips and explanations of the different features as you try to use them. I think that there is no real need of watching a tutorial of how it works since there are mini tutorials integrated in the software to help you in the beginning.

One thing that disappointed me is that I was unable to record what was happening on my screen without the audio. Even when the video is done, there are few editing options and you simply don’t have the option of removing or replacing the audio. The only thing you can actually do to edit in your screen capture video is trimming parts of it.

Ian Harac mentionned that “If image or video capturing is something you do more than once a week, Snagit 12 is essential.”

In conclusion, I think that Snagit is a great tool to incorporate in an ESL class, if ever your budget allows you to do so. Even if Snagit offers a discount for education, it still costs 29.95$ for a single user. There are no annual fees for the software, but this still means that you would have to invest 30$ for each of your students if, for instance, you want them to use it for video reviews. However, in the long run, I think that every teacher should be able to invest a 30$ in order to have access to Snagit at least for himself or herself. Snagit is definitely a great way to incorporate technology inside or outside the classroom.

Christine Poulin, future ESL teacher

Camtasia : an Education Video Tool

Camtasia, created by TechSmith, is an education and information video tool that records everything that you are doing on your computer screen. Many videogames’ walkthrough videos, program explanation videos, etc. were created with this software. In education, tools that can film your computer screen can be very useful, to give a distance class for example, or to create projects with your students. There are many possibilities related to teaching, but how can it be used to teach a second language in a classroom? We will explore how the program works and what can be created.

First, since there are many different functionalities, they have to be introduced and explained, which is why I created a video recording the use of the application (you can find it here). You can install Camtasia on your computer, there a different versions for Windows or Apple, and you can download the free-trial. Indeed, Camtasia is not a free tool. If you want to keep it after you tried it for free, it will cost $299.99 for a single user to buy the software. When installed you can start using Camtasia, it can open automatically after the download. The software will introduce the different tools with tutorial videos to help you start the creation process. You can add images or videos from your computer, add audio, add texts and many other options. You can save your video, share it using Youtube and Google Drive, you can edit it the way you want using the timeline at the bottom of the screen, you can record your screen using the record options, the possibilities are endless!

Capture_Camtasia

I personnally tried it, like shown in the video that I created if you click on the link in the article. After a few minutes of exploration, I tested the functionalities and was able to produce a small introduction video. However, the fact that we see the title animation and the image downloaded from my computer at the beginning is a mistake. Like shown on the image above, the screen recording was added after the small video that I created, which was not exactly what I was looking for. Therefore, I now know that I have to create the video live while recording. But, other than that it was quite simple. If you click on the screen recording button, there will be another window opening on your computer where you can set the audio and/or the webcam option. I disabled the second functionality, since I did not want my face to appear on the screen. Then, you only have to click on the record button and it’s on. You can pause/stop the recording whenever you want. When the recording is over, you can save your video on your computer and share it. Easy, isn’t it?

In an ESL teacher’s point of view, I think that Camtasia can be quite useful. However, you need to have a good budget if you want to use it beyond the 30 days free-trial. It could be used by students to create projects, but since there are so many tools available in the software, I think it would be too complicated for elementary school students. I would ask high school students to create a video on a given subject as an evaluation. But, I think it might be more useful for teachers. They could use it in the classroom to teach vocabulary or grammar, it could be used to present a project to the students or it could be used for introducing a new unit. This tool will certainly spark the students’ interest. However, what is the most interesting in education with Camtasia is for distance classes. Since you can record your computer screen, you can record a powerpoint presentation and record your voice while explaining the subject. In fact, you can even create a video using Camtasia and use it to give the class. There is a lot of video creators, including teachers, that were looking for a software that could create quality videos while being easy to use. Camtasia is an answer to this request.

In summary, I would recommend using Camtasia in a second language classroom, if the teacher as a sufficient budget. I can be used for teaching a class or for creating projects. However, given the complexity and the diversity of the tools, I would not recommend using it with elementary school students, unless it is for giving the class. I think that high school students and higher grades (college, university, etc.) would not have any problem using it, if they listen to the tutorials or the software is well explained by the teacher before creating. Therefore, using this software in ESL teaching is simple and it can be motivating for your students. It changes from the traditional way of teaching, technologies are rapidly making their way into education and Camtasia is a good option.

Noémy Lacasse
BEALS student at Ulaval

Snagit

Internet is full of very useful tools to help you create websites or blogs, interact with friends or coworkers, and basically do anything you want without leaving your chair. However, using new apps, websites, or social networks can be challenging when you have no idea how they work. I am sure that once in your life, you have watched a tutorial on Youtube in which you hear someone explaining how a tool works and see the speaker’s screen as if it was yours (e.g. Here’s a wordpress tutorial of this kind). But have your ever wondered how these videos were made? I thought it was extremely complicated and that you had to somehow film your screen in an awkward way, but that was before I heard about Snagit.

What it isimg_snagit-icon

Snagit is the print screen key’s smarter sibling. It does not only take a picture of your screen; it also records everything you are doing on your computer and allows you to edit your pictures with the various options available.

How it works

First of all, Snagit is not a website; it’s a program screen toolyou must install on your computer. You can try it for free for 15 days. The installation only takes a few minutes and, once it’s done, you have a little hidden tool bar within easy reach which you can move to any side of your screen where it won’t be in the way. You will also have to either create a TechSmith account or sign in with Google Drive (which is the option I chose) so you can save your work and access it easily.

Now the fun part fdbsbegins. By selecting “image” on the tool bar, you can take a screen shot of your entire screen or select a particular area of the page. The area you selected will open in the Snagit Editor page where you will be able to, among other things, crop, resize, and add text to your image.

If you wish to create a video to demonstrate something through your screen, you will need to select the “video” option on the tool bar. Once again, you can choose to record your whole screen or just a part of it. The actions done in the area you selected will be recorded once you click on the record button. You can also record your voice if you want to explain what you are doing at the same time. I suggest you use a microphone for a better quality of sound. Unfortunately, you will have to install Camtasia to edit your videos which is another program from TechSmith. Once you are done editing, you can upload your work to Google Drive or to Youtube. (note that if you have a Mac, things work in a slightly different way)

How to use it in an ESL classroom

Snagit has a few great ideas on how it can be used in a classroom in the education section of the website. At first I wasn’t sure about how a teacher could use it in a classroom so I had to do research and look at what other teachers did. I realized that Snagit was a great tool for flipped classrooms, grading and giving feedback but also for students to use.

Flipped Classrooms

With Snagit, you can record your lessons and send the link to your students for them to watch as a homework. They can each go at their own pace and watch the lesson over if they didn’t understand the material right away. Then, when students come to class, you can focus on the most difficult areas and have more time for oral interaction activities which are crucial in ESL classrooms. These are the basis of flipped classrooms and they can be created easily with Snagit. A particular point was brought to my attention by a middle school teacher, M. Rob Z. :

“Snagit is a great little tool. I can record whatever’s on my screen, including my webcam. I think it gives it that human element, where you can see the person talking to you and not just hear the voice.” .

Some students will prefer having a certain contact with their teacher and the option of including the webcam in the recording can make a big difference for those students. Especially in ESL classrooms, listening to an audio recording can be challenging since you cannot see the persons facial expressions or even the movements of the lips. Your ESL students will benefit from seeing you at the same time as hearing your voice.

Grading and feedback

2016-04-15_15-43-59With Snagit, you can grade, give feedback, and correct assignments directly on your computer when your students submit their work digitally. You can add text boxes, highlight or cross out certain words, and even add stamps. But what really makes correction with Snagit stand out from the crowd is that you can give personalized audio feedback. As mentioned by an English teacher, Ms. April Gudenrath:

“Reading comments is one thing, but hearing it from the teacher—the way she says it—is another thing.” 

This will give you the opportunity to give detailed feedback to your students without using your precious class hours to do so. Some students are too shy to come to their teacher and ask for precision. Each student will be provided with the same amount of clear explanations on what went well and what needs to be fixed to be able to draw on these comment on their next assignment. This feedback will be much more effective than the few comments left on paper margins to which we are used to.

Student use

Unfortunately, there are not many options for your students to use Snagit. This tool is more useful for teachers than for students. However, if you really want your students to use it, here are a few ideas to do so:

  • Oral presentations; Your students could build a presentation about various topics and record it with Snagit prior to presenting it to the class. They could create a PowerPoint with interesting pictures and record their voice explaining what the pictures are about, depending on the topic of the presentation. However, the human aspect might be missing from the presentation even if they use the webcam option. If you are to present these videos in front of your classroom, you might have to think of something to keep the students interested.
  • Demonstration of a website they like; You could have your students choose a website they like and create some sort of a tutorial explaining how it works and why they like it. I think students would like it since they would be allowed to choose a website of interest and present it without being in front of the class. This is a great way for them to practice their oral English and develop their knowledge of technology by watching their classmates’ videos.
  • Peer feedback; When practicing their writing skills, you can ask students to give feedback to a peer using Snagit. I think students would like the fact that they can play the role of the teacher on a friend’s copy by adding stamps and comments. It would help them develop their proof reading. This kind of exercise would be similar to an exercise where you have to find the mistakes in a text. After the peer feedback, you can add other comments or support the previous comments left by the corrector.

My point of view and my try with Snagit

Snagit is really easy to use, contrarily to what I thought at first. Signing in is quick since you can connect directly with Google Drive, which is a platform I was already using. When I first used Snagit, I was pleased that each time I discovered a new option, there was a little pop up screen that explained how the new option worked. I decided to try out these different options to show you what could be done with it.

Pictures

To try out Snagit, I decided 2016-04-17_15-45-30to give myself feedback on an assignment I had done. I first opened my text in a Word document, then I used the image capture option to send a picture of my text to the Snagit Editor. Then I underlined and highlighted the mistakes and I added comments and stamps. When I was adding stamps, I realized that you can upload a great variety of stamps on this part of the website. You simple download the link and the stamps upload directly in your stamp gallery. I also wanted to try the audio feedback so I recorded a sample of comments related to the same assignment and uploaded it to Google Drive. I thought it was great to give detailed feedback about certain types of errors, to give advice, and to encourage a student for his/her work. I would definitely use Snagit to give feedback to my students because I feel that they will remember what their mistakes were better and that they will be able to listen to it more than once if they forget about something.

Videos

I also tried the video capture option to create a tutorial where I explained how to create a “vortex” on Smartboard for an in-class activity. I think videos like the one I made are a great way to explain projects because, since students have access to the video, they won’t ask you repetitive questions all the time. They can watch the video to see where you clicked exactly and what needs to be included in their work. I would definitely use Snagit to explain projects or to do flipped classrooms since it really facilitates the creation of material.

Cons

Unfortunately, there was something wrong with the tool and I wasn’t able to upload my work to Youtube. The option was visible but I was unable to click on it which is why I chose to upload my work to Google Drive. It was a bit frustrating because it seemed to be pretty simple in the tutorials and the pictures showing the procedure but it didn’t seem to work for me.

Plus, I think Snagit can be really usefull for teachers, but not so much for students. I think that TechSmith should think about adding options in their education section so that students can use the tool in a more useful way.

Finally, it is unfortunate that the software is not free. In certain schools, it can sometimes be hard to have a budget for technological tools and, given the fact that it is a tool designed for teachers more than for students, you might have to pay for it yourself as a teacher. However, it is a tool worth its price according to Tom Negrino in his Snagit review:

Given its $50 price, especially considering that gets you both Mac and Windows versions, Snagit is an excellent value. It does much more than the $69 Snapz Pro X, from Ambrosia Software, and works more reliably than the $30 Voilà from Global Delight.

Verdict

Despite the few difficulties I went through while using Snagit, I would like to use it with my future ESL students . I think the flipped classroom idea is really innovative and Snagit is a great tool to create new material for this type of classroom. Feedback is much more interactive and I am sure there are many other great ideas I didn’t think about on how to use Snagit in a classroom. You should download the free 15 days trial if you have doubts about the usefulness of the tool. You get the whole version with all the options for free! So you have no excuses, try it out and I am sure the trial will convince you.

Karine Veilleux, TESL student at Laval University

Wideo: Pretty good, but not good enough

When teachers feel like becoming creative, lots of wonderful tools can come to the rescue. There are many ways to become an up-to-date teacher ! Wideo is one of those platform where you can cut loose and create videos on any subject you like and share them with your students when time comes and vice versa. Unfortunately, it has a lot of downfalls, this post will explain everything you need to know about this tool.

Wideo is a beautiful websites that allows to create animated videos with texts and pictures that are called Wideos. You can get a free account, which gives you access to 30 sec long videos and a couple of templates. You can also pay 9$/month to have access to 90 sec long videos and all templates, 19$/month for 180 sec videos or 39$/month to have unlimited time and more. Once you registered, the website asks you what you are using the website as: for example, if you are a teacher, a student, an entrepreneur, etc. The website classifies their templates by categories that you can browse. As a future teacher, it is great to know that there is an Education category but less to know that it has only 5 templates, one of wich is blank and another one that requires you to upgrade to a paying program.Screen Shot 2016-04-17 at 10.08.45 PM 
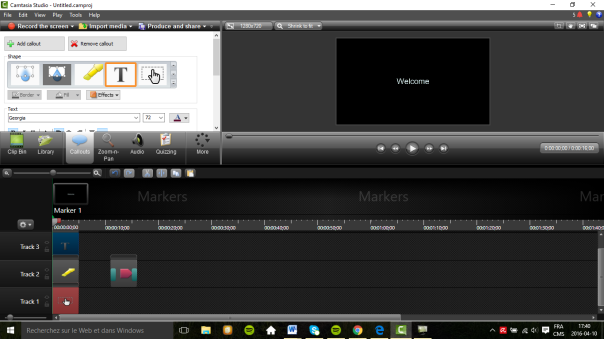
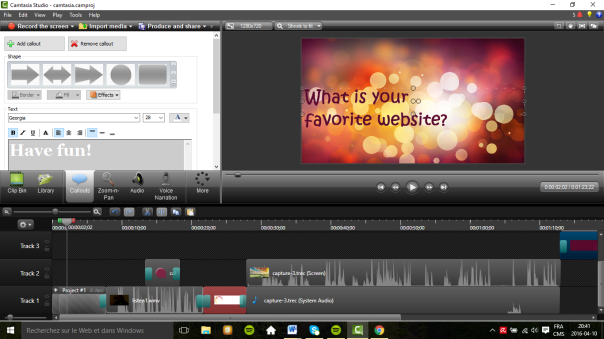
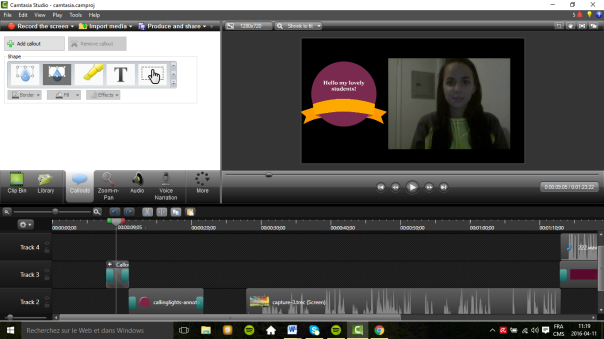
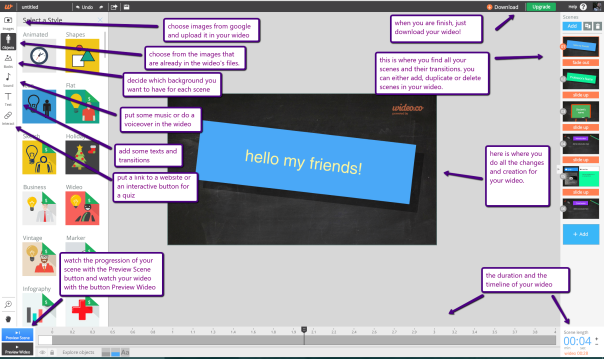
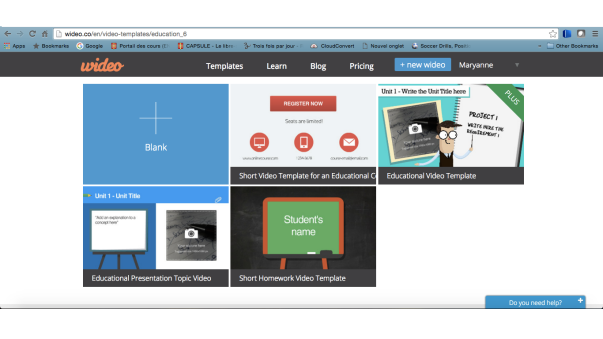
To create a Wideo, you can start from scratch, but you can also use a template, which is highly recommended for beginners. When using a template, creating your videos is very easy but also very fun ! Your video is divided in slides, just like a Powerpoint. You can change the background of every slide, using the ones from Wideo’s library or by uploading some of your own pictures. You can write in the provided text boxes but also add more if needed. You can customize the writing the same way as in any document: you change the font, the color and the size. This platform also allows you to add buttons to a video, such as a link to a website or a document.  You can even add sounds, such as a recorded voice or music. This allows to create an ambiance or explain the subject on the screen as it plays. You can also play with the transitions between the slides to create a more dynamic video. One point that I think is really great about Wideo is that it has a live chat with the support team, that means if you ever wonder “Hey, can I do this with Wideo ?” or “ Why isn’t this working”, you can ask them at any time. On the same line, this website has a “Learn” page that has many videos that explains every aspect of Wideo. It has tutorials on every tool of Wideo and it answer frequently asked questions. 

Screen Shot 2016-04-17 at 10.09.59 PM
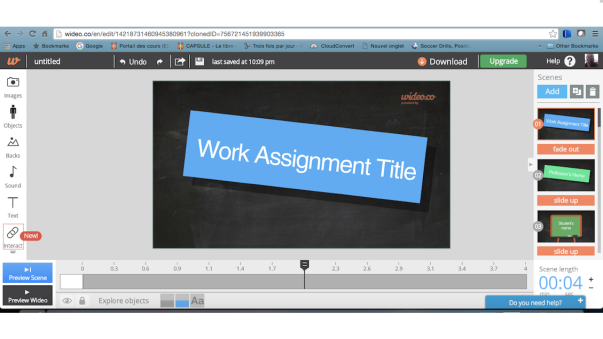
This tool can be a great add to any classroom. It would be great to make quick concept reviews that students can access at home; to help when they’re doing homework and studying for exams. These videos could easily become a resource for your classroom. Wideos can also be used in class to make theory more interesting. For example, when teaching new vocabulary words, the days of the week, months, ordinal numbers, etc, it would be very interesting to use it to introduce the theory in a fun way, with pictures, music, sounds and animation. It can easily be adapted to any group of age. I believe Wideo can also be given as a project for secondary level students. Since it is fairly easy to use and students are usually quite accustomed to technology, kids will quickly understand the basics. They could shortly present their future job or give the main characteristics of an animal or a sport. The students could work on their project individually but it could also be a project done in pairs. Although given the short length of the video, it would best be done individually.

Unfortunately, since Wideo only allows you to do 30 seconds videos for free, its options are very limited. It doesn’t allow you to do big projects with your students or explain extensive and complex theory You can fix this problem by paying 39$ per month to have unlimited time but this is a very unrealistic option for an everyday school here in Québec. Furthermore, there are many other websites and applications that can give you the same advantages but for free.

In conclusion, even thought this website has many considerable advantages such its pre-made templates and its user friendly configuration. This tool has many downside, the most prominent ones being its price and the shortness of the videos that comes with the free program. Video still has good sides to consider, it can be an easy tool to use when wanting to quickly create a fun video to introduce a new subject, unit or theory. It’s very user-friendly and fun to use, even tough you might not be good with technology, you and your students will quickly get the hang of it. It is still to remember that all these advantages can be found on other websites for free and without the time constraint.      All-in-all, this is an interesting tool that could be very interesting if it didn’t cost so much.       

Maryanne   

Jing: Screen capture as never been so educational!

What is Jing?

According to Wikipedia, Jing is a screencasting computer program which was created in 2007 by the TechSmith Corporation. It allows users to capture images and videos and upload them to the web with the clipboard. In 2009, the company released an alternative called Jing Pro, a paid version which removed the ads from the screenshots and the videos and allowed users to have a better image in high-definition (HD). Yet, this version only stayed on the market for 4 years until TechSmith announced its retirement. In other words, Jing is a computer service that allows screen captures of videos and photos and then finally shares them on the web.

How to use it?

Even though it is simple to understand the functionality, when downloaded, Jing explains how to use the tool in an interactive short tutorial. The users can then learn and practice until they are ready to use it by themselves. If after the tutorial, there is any confusion or lack of understanding, TechSmith homepage possesses a link to Jing’s tutorialJING_logo2s.

In the short tutorial, it is explained that Jing takes the form of a sun-shaped icon which always stays at the top of your screen, making it easy to access it at all time. When placing the mouse over it, the icon expands three “sunbeams” with little round-shaped icons at each ends. The first one starting from the left looks like a plus sign and is for the capture. The second one represents two polaroid photos and is the captures history. The last one shows two gears and is the icon for accessing Jing’s options, such as preferences where you can edit your account, a help center where you can ask questions about the program, a feedback section where you can write your opinion to TechSmith, an exit button to sign out and finally, a finish button to exit Jing’s options.

In order to take your first capture, you need to go on the page you want to screenshot. Whether it is an image or a video, you need to click on the first icon and frame the content of your choice. When this is done, you need to choose between ‘capture image’, ‘capture video’, ‘redo selection’ and ‘cancel’. After that, you can rename your screenshot and save it wherever you want, then share it or upload it to the web through your screencast account. The screenshot will also be saved in you capture history, where you can go and add framing, highlighting, texts and colors.

My experience

The advantages of Jing are that it is a simple tool for screen capturing and scree casting, as well as being easy to use for everyone. It is free to use and the only requirement is to create an account in order to download it. Jing also runs on both Mac and Windows computers.

At first, I thought that there were not many instructions on TechSmith homepage, then I realized it was because Jing is one of those easy screen capture programs. The introduction tutorial might be simple and short, but in my opinion, it should be that way. Jing has been created to simplify the capture of videos and images, which is why the tutorial should be an example of that simplicity and be as easy to understand as it is right now.

Unfortunately, as described by Rongfei, a student in a B.A. degree in English who gave a complete review of his trial with Jing’s program:

“The disadvantage of Jing is that it only allows 5 minutes of recording, which restricted it from being used to record large projects such as Photoshop tutorial. When I was planning my capstone project, I eventually decided to use Camtasia instead of Jing because of this shortcoming.”

Indeed, 5 minutes of recording seems small, but if the information is known before, the users can easily plan accordingly. Instead of one long video, the users only need to structure and to record their video in several parts.

Using Camtasia, another screen capture program from TechSmith, I was able to make a short video on how I use Jing for the first time. Because of a technical problem related to my microphone, Camtasia was unable to record my voice as I explained everything on Jing. Still, I think the video is well detailed and understandable.

here is the link to the video: https://www.youtube.com/watch?v=2uWt0xNSgNg

Use as an ESL teacher

2011-08-29_0858-blog-jing-example
explaning steps of an exercise

As a future ESL teacher, I think Jing can really be of good use for students, since they are increasingly asked to use technology in the classroom these days. ESL students can use Jing for many tasks as it is a great learning tool to practice and improve their writing skills. For example, ESL teachers could use Jing as a grading tool, giving feedbacks and sharing it automatically on screencast’s website. Jing could also be used in small projects and in-class activities such as book reports, presentations, activities related to grammar and language and many more. In my opinion, the use of screen casting in an educational context is excellent. It could be used by teachers to maximize their time in order to focus on corrections and kids who have special needs. They could record all the instructions of every classwork and even homework, making it easy for students who did not understand or forgot something to hear the instructions as many time as they need.

Lindsey Shepard, a student in Instructional Technology gave her opinion about the tool on her blog, exemplifying my point of view on Jing.

“I have used Jing many times for projects during my graduate coursework requirements. […] Jing, hands down, is one of the easiest-to-work, simplest tools for creating screencasts. […] Jing has ultimately limitless uses in education. From face-to-face course, hybrid, or solely online, screencasts can reach a host of learners of all styles. With the video format Jing’s final presentations are presented in, it allows the learner to stop, pause, or replay any step in which he/she needs to hear or watch again. Especially for computer teachers, I believe Jing is an excellent way to create these instructional screencasts”.

Conclusion

To conclude, I believe that Jing is a useful screen capture program for ESL teachers. Capturing images and videos with Jing is simple and straightforward and the program is completely free, which makes it a perfect tool for teachers. Even though Jing can only go up to 5 minutes of recording, it is a great program for small projects and in-class activities. Finally, because of its simplicity, Jing is a screen capture program that can be used on all levels.

Justine Fournier-Brassard

Laval University

Rediscover Screenshots with Snagit

Nowadays, screenshots is a very well-known feature for computer users. However, the printscreen does not allow you to edit what you captured. If you ever had this problem, Snagit is definitely a tool for you.

What is Snagit?

According to their website,

Snagit gives you the complete tool for quick screen capture and screen recording on Windows and Mac. Combining traditional screenshots, videos, image editing, and file sharing.

This software cost 79,66$ and offers a free trial version.

My experience

After downloading the software, I began my exploration. When Snagit is launched, a small black line appears on the top of your screen. By hovering your mouse over the line, a small window appears and you can access to the capturing tool. The window contains the capturing feature, an access to the editing tool as well as the options for the software. To take a screenshot, you simply click on the red button which will bring up a crosshair that allows you to select the region you want to capture. Also, a little window will pop up to explain you how to proceed and all the short keys that you can use. When you are done selecting what you want to capture, another window will appear. From there, you can choose to do a video or a screen shot.

The video feature is interesting. It allows you to record everything that happens in the region that you selected until you press the stop button. Additionally, the feature allows you to record your voice over the video which can be very useful. After recording your video, the editing tool will automatically pop up. From there, you will be able to trim your video. This is basically the only feature that is offered for videos alongside with adding arrows.

Let’s come back on the image feature which is the most developed.  After selecting the region you want to screenshot, the powerful editing tool will show up with your image ready to be edited.  The tool tab is on the top of the screen and allows you to draw, blur, cut, add text, add steps and much more. When you are done editing your image, you can save or share it. It can be saved in any format.


The sharing feature is very interesting. It allows you to send your video or your image directly to PowerPoint, Word, Google Drive, Dropbox and more.  The sharing process is done without even leaving the application which is very useful.

According to Edward Mendelson, Jeffrey L. Wilson from PCmag, the only downside of snagit is that there is no undo feature that allows you to remove all your modifications at once. They did not like the fact that you had to press CTRL-Z multiple times to remove one modification after the other.

Through all my exploration process, short tutorials popped up every time I tried a new feature. If more explanations are needed, you can click the ¨learn more¨ button beside the tutorial which will bring up more in depth instructions. Also, the interface of the software is very neat. It looks professional, it is easy to use, and everything is well disposed.

Use in ESL teaching

With the video feature, it is easy to imagine how Snagit can be used in class. Imagine that you are an ESL teacher and you have to miss a class. Don’t worry, Snagit is here for you. With the video feature, your students won’t fall behind. The only thing you need to do is recording your voice over the activities that you want your student to do. Thus, the only thing your substitute teacher will have to do is showing your students the video. Moreover, with the sharing feature you can upload it on your Google Drive and then, share it with your students.

Additionally, the video feature could be used to grade a student redaction for example. By recording your entire computer screen, you could add arrows and commentaries on a student’s work while explaining through your microphone. Then, you could share the video of your explanation through Google Drive with your students. Also, the screenshot feature could simply be used to include images in a Smart Board presentation for example.

Finally, I would definitely recommend this tool for ESL teachers. It allows you to edit screenshots and share them quickly and easily. Moreover, the video feature is very useful for teachers who like to send their task online because it allows you to record your explanation while modelling the task for your students. So, if you are simply looking for a tool to help you edit your screenshots or to record your lessons, Snagit is definitely a tool you want to try!

Charles-André Richard

Université Laval

References

https://www.techsmith.com/snagit-education.html

http://www.pcmag.com/article2/0,2817,2364304,00.asp

http://www.pcworld.com/article/2602914/snagit-12-review-the-premier-screen-capture-tool-for-windows.html


My Opinion on Jing as a Future Second Language Teacher

JING_logo2What is it?

Jing is a screen casting tool developed by TechSmith that allows users to take a video or a photo of what is happening on their own computer screen. The basic version is free and the pro version is 14.95$.

How does it work?

Jing is a program that needs to be downloaded. First, a new user needs to go on Jing’s website and click on “Download”. After a few minutes, the program is almost ready to be used. At the top-center of the computer screen, there should be a yellow semicircle, it is Jing. Then, the user moves the mouse over the semicircle, three options will appear underneath: “capture”, “history” to see previous screencasts,  and “more” for the credits and help section. To start a screen cast, the user needs to click on the “capture” button. Once this is done, the program allows the user to click and drag on the part of the computer screen needed. Once the part needed is chosen, the user releases the drag. Now, four options appear underneath the chosen part: “capture an image”, “capture a video”, “redo”, and “cancel”. To take a picture of the screen, the “capture an image” button is used. To take a video of what is happening on the computer screen, the “capture a video” button is used. To redo the selection, the “redo” button is used. The “cancel” button is used to close the program.

jjhjhj
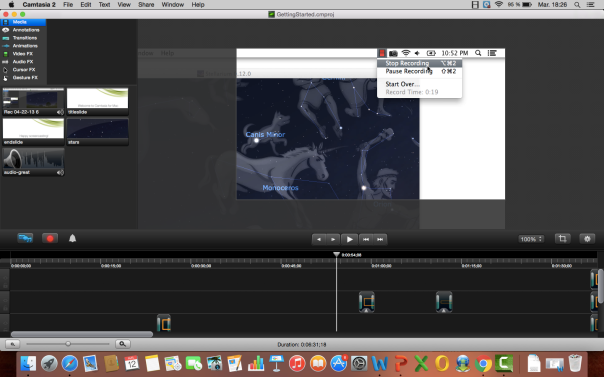
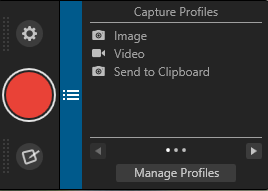
Next, if a user decides to take a screenshot, he can write on his picture, he can highlight certain parts, he can put arrows, and he can frame it. Then, four options appear again: “share” to transform the image into an URL and share the image, “save” to save the photo on the computer, “copy”, and “cancel”. If the user decides to take a video, a small menu will appear underneath the selected section. There is a button to start the video, to stop the video,  to pause the video, to resume the video, and to restart the video. There is also a button to mute the sound and a button to cancel. The user can decide whether he wants his voice to be recorded or not. Once the user is satisfied with the video, he has to name it. Then, he can choose to share it via an URL, or he can save it as a SWF file.

jisdidisd

ESL Teachers’ Point of View

In my opinion, the program is perfectly suitable for teachers and for students, but especially for teachers. It is quite simple to use. The program does not have a lot of options, but that is what makes it easy to use. The options offered are necessary.

It could be used in a classroom setting in many ways. First, a teacher could use Jing to explain specific things to his students, in extension to his course. If the teacher wants that his students do a project with SMART Notebook, he can do a video on how he would use it for the project and he can comment while doing it by recording his voice. Then, he can share it with his students. This is practical because the students can follow with the teacher and watch the video as many times as they want outside the classroom. Moreover, the teacher can also use it for simpler things that do not need to be stated in the course. For example, if the teacher wants his students to do a research and do a reference list based on Google scholar, he can use Jing to screen cast how to do it and thenshare the video to his students. In brief, Jing could be used to make short lessons that can accessed by students anywhere and anytime. See this video on how to cite using Google Scholar made by myself for instance.

Then, a second language teacher could use it to work on pronunciation with the students from a distance. For example, he could have a Microsoft file with words he realized were hard to pronounce for his students. Then, he could record himself saying the words with the right pronunciation while putting his mouse over the word. Then he would say to repeat after him. This could be used during the course, or it could be also used after school, as a homework or as a review of the course.

Next, it could also be used to give audio-visual feedbacks to the students on their written production. It is way simpler to share a video with the student than to meet at a specific place, at a specific time. In the video, the teacher can go over the text and underline the mistakes, he can then explain what should have been said or how it could be improved. At the end, he could give general comments on the content of the text. Jing is a great tool to use to make audio-visual feedbacks to students.

Finally, the teacher could use Jing to make a screencast of what to do or how to use certain programs to the substitute teacher. It is way more understandable than to do a step-by-step on a sheet.

As for the student, he could use Jing with certain specific school activities. For instance, the assignment could be to create a story or to use a certain program in the second language. This would be interesting for students as it allows them to use their creativity and to increase their use of technology.

Other Critiques

A writer of EdJugo, Jalger, states that “Jing really is a must have screen capture tool for every teacher. It makes screen captures easy and convenient, with little more than a press of the mouse button. It allows you to share images, add your own notes or highlights and make video tutorials for students.” As stated earlier, it is quite easy to use for both the students and the teachers. Sharing tutorials with the students has never been easier!

Then, Jill Mountain, a teacher, says: “I use this tool to enhance my feedback for some of my online students in developmental composition courses. Students can be overwhelmed by comments, and sometimes don’t understand the terms I’m using. For example, instead of simply adding a note that a sentence is a fragment, I can highlight it while I’m describing the sentence in a Jingo video and demonstrate to the student how it could be corrected.” In fact, Jing could be used for normal courses, but also for online courses, as it is even more complicated to meet with the students. By using the visual and the audio, it is simpler to explain certain errors and to correct them.

Finally, Julie Pickar, an early childhood teacher, explained: “As an early childhood teacher I use Jing in my classroom to record myself logging into the class website. I can then play it back to the class multiple times so that they can learn the procedure themselves.” In fact, Jing can also be use to do modeling and to show what the teacher is doing on his or her computer, on the board. With the repetition of the process, students will gradually remember. They will then be able to use it on their own.

Conclusion

To conclude, I believe that Jing is a useful screencasting program for students and second language teachers. In fact, it is simple to use,  and has many uses in the classroom: tutorials, feedbacks, lessons, and specific projects. Moreover, the videos when shared can be accessed anytime and anywhere by the students. I would definitely use it in my classroom!

Maximme Grenier

Jing: A Free and Easy Tool

Jing is an application that allows users to take screen captures of images and videos on their computers. Jing was developed by TechSmith, a company founded in 1987 which provides business and academic software products to foster communication and collaboration among people. Indeed, With the tool, users can share captures they take with others via email, Facebook, Twitter and even YouTube. Moreover, users can share the images and the videos on Screencast.com, a website where they can upload content easily and privately. On one hand, Snagit, a supplementary tool for the application, is very useful for users who want to edit their pictures. On the other hand, Camtasia Studio is another supplementary application that allows users to edit their videos. Jing is a great software for current and future ESL teachers because it lets them take screen captures that they can edit and then share privately with their students and because it allows them to record videos which they can edit and upload on the Internet.

First, Jing users can take screen captures and send them by mail or share them on their Facebook or Twitter page. This feature is interesting for ESL teachers because they could take pictures of their lessons and share them to their students. According to EdTechReview, “This is a great feature for teachers who want to add notes on top of images or text, or want to indicate something to their students.” Indeed, if a teacher takes a picture of a good feature article, he or she can edit the picture to highlight the important elements that help structure the text such as the lead or the quotes. Moreover, if students want to share an image, they can use a website which is called Screencast.com. This website is 100% safe because its users can upload the content in specific private folders. In order to access to the image, users must send the link to the content via email or on Facebook or Twitter. Naturally, students can easily share private images to their peers to compare their work as in the example of the feature article.

Second, Jing allows its users to capture videos from the Internet, edit them with Camtasia studio and upload them on Screencast.com or share them via email, Facebook or Twitter. This feature is very useful for current and future ESL teachers because they can make comments on video lessons or demonstrations of other teachers and share them with their students or even with other teachers. Therefore, students benefit from the content of the lessons, which can also serve as an example to current or future ESL teachers. Teachers can select the information they think is relevant for their own lessons and thus develop an entire course by relying of the information presented in the online lessons. However, according to TechAdvisor, videos cannot be embedded somewhere as just a video. Users have to share a link for the video in order to get access to it. Therefore, videos cannot be embedded on public platforms such as class forums. Unfortunately, teachers who would want to create a public forum where students could see a video of a lesson would not be able to embed the video directly on the page. It would be time consuming for teachers and students to have to click on the link and to wait for the video to open on a new page. As a result, students would lose precious working and learning time at home as well as in class.

In conclusion, Jing is a free, safe and easy to use and application that allows its users to share links to images and videos by email, Facebook or Twitter. This tool is particularly helpful for current and future ESL teachers who can edit and share pictures and videos on Screencast.com with their students. However, videos cannot be embedded on a website and a link must be shared in order for users to have access them. Subsequently, teachers and students lose important learning time and their improvement is hindered.

Adobe Captivate 9

Adobe Captivate is a program for creating interactive presentation. In fact, Captivate lets the user build storyboards, which is similar to a Power Point presentation. Unlike Power Point, Captivate gives the author more possibilities and can create more interactions in the presentation. For example, it lets the author add questions and quiz the person viewing the storyboard; Adobe calls this feature a responsive eLearning design.

How it works

Before starting to use Captivate, Adobe offers loads of tutorials to learn how to use its multiple features. In brief, once logged into the program with an Adobe account, the user can choose different models to create the different presentations from. The options Adobe offers to create are: a responsive project; a software simulation; a video demo; add and modify a presentation from PowerPoint; a presentation from Captivate Draft, which lets you draft form any tablet or workstation; even a blank project, to create the presentation from scratch.

Capture d’écran 2016-04-15 à 09.34.39

When creating a blank project, the user can add much any feature from the other types of presentation previously mentioned. The first step is choosing a background. Indeed, the user can choose the theme from selection offered, modify the proposed backgrounds or build a new one to fill his presentation needs. The second step is choosing what type of slides that will be in the presentation.

Capture d’écran 2016-04-15 à 09.38.17

Content slides let the user add text and pictures, while offering multiple page layouts.  PowerPoint slides let the user import PowerPoint a power point presentation to the Captivate documents. Video slides can also be added. In fact, when using the video slides, Captivate lets the user record the screen. By doing so, the user can add a screen capture of the previous slides in the presentation, thus making some explanations simpler.Question slides give the user the opportunity insert different type of questions in the slides (e.g. multiple choice question, true or false, sequencing, association and others). When using the question slides, it is possible to choose how the questions will be graded as well as how the results will be given. Software simulation slides let the user add a software they built and have the people following the presentation test it out. Questions can also be added after the simulation in order to get a feel of the performance of the software.

Capture d’écran 2016-04-15 à 09.38.32

After the different slides are added, the user can start making the presentation more interactive. Indeed, multiple different features can be added to the presentation, such as, images, shapes, audio files and animation. The different presentations can also be adjusted for any type of technology, by positioning the content. This way people using phones and tablets can still get the same quality of presentation as on the computer. One the presentation is perfected, files are easy to export, and the program offers different exportation methods, in order to facilitate the sharing process.

My experience

After spending a lot of time installing the program to my computer, I was finally able to try out Captivate. At first, I felt overwhelmed by the functions, so I accessed the Adobe know how webpage in order to learn how to use the program. After watching a couple of very well explained and built tutorials I started building my presentation.

The first thing I realized when changing the background was that their was not a lot of options offered, but I found that you can easily download more as well as change the ones offered.

The second thing I really liked about the program is the possibility to add question slides. In fact, the question slides, offer different types of questions, lets you choose how many questions there are, how the results will be show and how the questions will be graded. At the end of the question slides you built, Captivate also builds a slide that compiles the results to the questions that were answered. I find that this tool is very interesting, since it give an overall idea to the person using as well as to the person that built the presentation. Even though using the questions creates a great interactive tool, some of the questions are hard to build and adjust. So many options are given when creating the question that it becomes hard to find the relevant tools.

The third tool I found very interesting to use is the video-creating slide. In fact, taking a capture of the slides is in my opinion very innovative and useful to add in certain types of presentations. By doing so, giving instructions on how to complete the previous slides could be done efficiently. It could also make correcting and reviewing easier.

Overall, I found that Captivate by Adobe can be an interesting tool to use, but I find it a bit too complicated to use. Indeed, since the program offers so many functions, tools and creative possibilities, I feel that the user needs to learn to master the program before starting to make effective presentations.

Here is an example of the use of the program.

Use in ESL classrooms

I believe that captivate could be an interesting tool to use with students learning a second language (L2). In fact, I mostly find that the question slides could create a motivating and creative way to test students on their learning. Since the program also lets the user put regular PowerPoint slides, it could be an effective way to test their knowledge right after learning a new lesson. Also, the screen-capture option could be very interesting to show students how to do something by a simple video. In fact, video capture creates an efficient way to give instructions. It could even facilitate the understanding of second language learners since they can see what they have to do in the video, without them having to understand every word in the L2. The video captures could also go back on the questions, to show the correct answer, again engaging visual comprehension for students. An audio file could even be added to explain why it is the right answer.

In my opinion, I find that the program would be useful since it provides a more interactive way to learn for students. Unfortunately, I believe it would be very time consuming for teachers to use Captivate, since it can be difficult to use. On the other hand, if they become comfortable with the program, the teachers could truly create motivating and engaging presentations. Overall, I fell that Adobe Captivate could be adequate for teachers who learn and master computer programs quickly. I would also only use it as a presentation tool, since I believe it to be too complicated and not necessarily the best tool for students’ use.

An interesting project that could be done with second language learners at high school level could be to first, present a lesson, for example on cognates. Then, when presenting the information, audio files could be added to the text, so students can hear the different pronunciation of the cognates, if there are some. Also, the person presenting the lesson could have students answer to questions on the cognates. Examples of question could be to differentiate the type of cognates, by giving pairs and asking what type of cognate they are (e.g. false friends, true friends…) or asking the students if it is true or false if a pair is a cognate. Once the students have answered, the questions, what would be interesting to do, is go back on the questions with the screen capture feature. By doing so, it would give the opportunity to the educator to correct, while showing what was the correct response. Again, an audio file explaining the differences in the cognates could be added.

Reviews

On the Adobe Captivate webpage different reviews are presented. Of course, the results on the producers website are positive reviews, but they still procure valuable feedback on the program. In fact, Damien Bruyndonckx an Adobe Education Leader and Apple Certified Technical Coordinator, said he found that Adobe Captivate always let him create his pedagogical ideas and that what he finds most interesting from this version is the ability to give personalized feedback. In my opinion, giving personalized feedback can be in fact very interesting when using the program in class settings, since the students don’t miss out on tailored feedback even though they are using computerized programs.

In the different possible question slides, a pre-test option is available. Christohper Pappas, from eLearning Industries wrote an article in which he raved about this pretest feature. In fact, he stated that this feature can help point students in the right direction. Then they can go back to the lesson and take the questionnaire again, which helps monitor their progress. This possibility can in my opinion be very helpful for students, since they can observe their mistakes and go back to the lesson in order to improve.

Moreover, user Micheal on CP Guru, a website dedicated to Adobe Captivate, wrote that the Captivate 9 version did remove some options from the previous version. In the opinion of the writer, this deletion of option was a good thing, since there were too many useless options, more specifically in the animations, in the previous version. Even though I did not try the previous version, I would agree with Micheal that the deletion on some functions is a good improvement. In fact, since I believe that the current version has too many options and that it makes the program more difficult to understand and thus, master to make great and effective animations, having more functions would be even more complex for the user.


Overall, learning how to use Captivate 9 by Adobe could be very productive in order to make presentation more interactive and engaging.

Dominique Falardeau
Futur ESL teacher
University Laval


Camtasia: A Useful Tool to Supplement Teaching

Year after year, education is changing; teachers adopt new techniques to improve their teaching methods. This way, they ensure that students achieve better results. Nowadays, technology plays a major role; it offers teachers a wide range of tools to help them diversify their course content while entertaining students. Camtasia Studio, developed by TechSmith, is one such tool that allows teachers to vary their ways of teaching.

What is Camtasia?

According to their website,

Camtasia takes you from screen recording to finished video

Indeed, the website allows users to record videos using a screen recorder. In order to use Camtasia, users must download the application. The website offers a free 15-day trial. Then, to record their screen as videos, the website offers many options to create attractive and professional videos. Indeed, Camtasia users can add

  • images
  • page titles
  • text boxes
  • transitions
  • effects
  • quizzes
  •  multimedia themes
  • backgrounds
  • tables of contents
  • audio recordings
  • videos using a webcam
  • cursor effects
  • captions

to their videos.

Subsequently, videos can be shared by being directly broadcasted on youtube.com or screencast.com. The website also sends a hyperlink to users so they can send their videos by email or just post them on a blog or Twitter. Finally, tutorials can be watched from any electronic device.

call


My Experience

Powerful, yet easy-to-use, Camtasia helps you create professional videos without having to be a video pro.

Indeed, I loved my first experience with Camtasia. I’m not very good with computers, but I found the website easy to use. The website has a section including PDFs to explain to users how to create videos. In addition, several tutorials are available on the same web page. Given the great popularity of Camtasia, many websites such as elearning.com, lynda.com, and wikihow.com explain how to use it. There is therefore no reason for not using Camtasia properly. It is important to mention that Camtasia is easy to use, but given the many options available, it takes a certain period of time before to become comfortable and create great videos.

Moreover, Camtasia is interesting since all the videos you can create look professional. I enjoyed the website given the wide range of offered options. I am a very creative person and the website allows leaving room for imagination. I created a video which in my opinion was aesthetically appealing with a title page, callouts, transitions and effects. The library section allowed me to choose items that matched well together to create a finale  professional product.  aaaaa.png

Finally, in his article, Christopher Pappas mentioned

On the other hand, even though it does offer a variety of functions and features, eLearning professionals with tight budgets might find the price tag a bit too steep.

Indeed, the downside of this application is its purchase price. Indeed, the purchase price, for teachers, comes to $ 237.89 and for personal and professional use, the price is $ 397.37. Obviously not all teachers can pay such a sum. So this is why the website elearningindustry.com offers some free Camtasia Studio alternatives such as Camstudio, Ezvid, and FFsplit that are websites offering the same kind of options which Camtasia suggests.

My Point of View as a Future ESL Teacher

Camtasia can be used for several purposes in class.

First, as a teacher, I could use Camtasia to allow me to give a course even if I am absent from class. If I know in advance that I have to miss a class I can just use the app to give clear instructions to my students. The substitute teacher would only broadcast the video in class and my students would know what they had to do as work. For example, in the video, I could add a video of me to have contact with my students and add audio recordings to guide them through the instructions. I would use my student book online copy to show them clearly the numbers they have to do in their activity book. Depending on the teacher’s planning, there are many ways to give a distance course.

lovely

Also, I could create a project which my students would have to use Camtasia. Since teenagers love technology, I would ask them to present their favorite website using Camtasia. I would ask them to explain how the website works by creating a tutorial and then present it to the group. My instructions for this project would be given through the use a Camtasia video. Also, in order to explain them how to use the application, I would like them to an online tutorial. Such a project could, in my opinion, be used with grade four or five students. Even if the application is easy to use, it cannot be used with elementary students or with grade one, two and three students being given that it would probably be too difficult and uninteresting for children to use it.

Here is the link of my video explaining the project using Camtasia.

It is obvious that there are many other possibilities to use Camtasia in class such as providing students class content in flipped classrooms, creating quizzes, commenting a PowerPoint, etc. Teachers simply have to find how they prefer to use in their classroom and they will spend a good time creating videos recording their screen.

Conclusion

In conclusion, Camtasia is a website which enables users to record videos using a screen recorder. They can create professional and aesthetic videos using different features. It can be interesting to use Camtasia in class since it diversifies class content and entertain students. Despite the fact that the website is quite expensive, if teachers have the opportunity to purchase the application, it may be worthwhile to use it in order to create interactive activities.

Camtasia: You need time to understand it

What is Camtasia?

Camtasia was created by TechSmith. It is a tool that allows you to directly create videos and presentations by screencast or with a direct recording plug-in to Microsoft PowerPoint. Originally, Camtasia was an enhanced screen capture program. It has since evolved to become, according to many, a very useful tool, especially in the field of ESL teaching.

What does it offer?

Unfortunately, Camtasia is not a free online tool. You can have access to a free 30 days trial of the tool. It is a good way to help you become familiar with the tool and to decide whether or not you want to pay for it. The fee is of $299.00. If you wish to update Camtasia to its latest version, you must pay a fee of $149.50. However, there is no annual or other fee.

Camtasia gives you many options to record and edit your videos. In addition to those previously mentioned, you may also use full screen or custom recordings. You can capture webcam videos and audio track. With the editor, you can trim out or emphasize elements that you jugde as essential or not important. Camtasia promises that your videos will have the best quality and will adapt to all types of screens. You can choose to publish your video in many formats, such as FLV, MP4, MPEG, 3GP and others.

If you wish to learn more about Camtasia without signing up for a free trial, check out this video.

My experience

Signing up for the free trial and downloading it was quite easy and took little time. When I opened the tool, I was greeted with a video that introduced me to some of the basic features of the tool and that helped me to understand what exactly could be done with it. However, I found the tutorial a bit overwhelming. When it ended, I was not ready to start using the tool and I had to watch more tutorials on the website (a link to them was provided and recommended during the video).

However, due to lack of time, I was not able to watch more than one tutorial.  Therefore, I did not test all the features of the tool. The most important ones were mentioned in the introduction video and allowed me to have a global view of what one might accomplish using Camtasia.

As someone who had never been familiarised with any type of video recording tool, I have to admit that Camtasia was overwhelming. In order to use it correctly, one has to watch all the tutorial and to invest a lot of time into trial and errors. I would not recommend it to someone who wishes to do a quick and simple video. The layout of the tool is very crowded with all the features. I imagine that this is the way it must be for such a tool, and that one can get accustomed to it after a while.

Use in ESL teaching

Students could be asked to design, record and publish a tutorial video. You could create a whole class project in which individuals or pairs would be asked to learn about an online tool. Then, they would have to try it out, write a script and record themselves as they go step by step through teaching their peers how to use the tool. Students would practice their oral production competency and familiarises them with particular technology. Lower level students could be asked to record a short videa as they work on different PowerPoint elements. These videos could be used as references by others and shown in class.

Although these possibilities exist, the options of the tool must first be taught. To do so, the teacher must carefully explore the tool and select the items that should be presented to the students. It does not seem enough to simply have them watch the videos before doing a project. Questions will inevitably arise, and the teacher must be able to answer them. Camtasia should be recommended to teachers who have already done some screencasting, are quite comfortable with a PC and demand a professional result.

Nevertheless, if you feel comfortable enough with using Camtasia in your classroom, it can be a wonderful way of evaluating oral interaction. Students who have a hard time talking in front of a class might prefer to be evaluated with this tool, as it would reflect their skills in second language learning more accurately.

Here are some benefits and great uses of the tool for those who master it, as stated on the East Carolina University website:

  • Pre-record course lectures
  • Provide supplemental course material
  • Provide step-by-step tutorials
  • Provide a tour of your online course environment
  • Record webcam introductions to weekly course content

My opinion as a future ESL teacher

I would honestly not use Camtasia in a classroom because I feel that it requires too much time for what it offers. Moreover, it is quite pricey. I do not believe that the tool would help me teach. It can certainly be a good way for students to teach other through short tutorials or presentations, but to do so they must master the tool.

Without having to be taught in a classroom, Camtasia could still be offered to students as an alternative to traditional oral presentations. It could also enhance a lesson by adding a recorded lecture that students can listen to at will in their homes. As Nathan Davidson states, “With the implementation of Camtasia’s screen-capture software, we can help ESL students fully comprehend what they are learning in class and help close the broad learning gap between them and students who are native speakers.

it should be recommened to teachers who have already done some screencasting, are quite comfortable with a PC and demand a professional result.

What Camtasia looks like

Video testing the tool (sorry for the audio, my computer has problems with its microphone)

Jing: making videos has never been so easy!


What is Jing?

According to TechSmith, a website that creates and sells online products like Jing and Camtasia,

“Jing® is a computer service that lets you capture basic video, animation, and still images, and share them on the web.”

Basically, Jing allows users to make some screen captures of videos or photos, record what they are doing, then, send or screenshot their video or picture to their teacher, friends or family, and finally to upload it to the web.

As said by Wikipedia, Jing was created in 2007 by the company TechSmith, and was later developed in 2009 to become Jing Pro, a paid version of Jing that presented more options.However, this version of Jing did not last and, in 2012, Jing Pro was out of the market. Nowadays, Jing is considered a very useful and easy screen capture application by users because it differs from other screen capture applications since it offers users “to share images and movies with people quickly and easily while chatting or emailing”. There is no Jing version for school but all teachers of every teaching fields can use the screen capture tool for teaching lessons, grading students’ work, and more.

What does it offer?

Jing is an uncomplicated tool that can be used whether for work, for fun or for school.  It also allows users to add some basic visual elements to their captures and to share their capture in a matter of time.  Jing is a free application in which you must create an account in order to use it. Thus, enter your email, username, and password, and you will enter on Jing’s homepage. When first entering on the application, Jing presents a video on how to use the tool. In my opinion, this short video is very useful since users will not have to pass a lot of time trying to understand the tool and to make some trial and errors; they just have to listen to that video once, and everything will be understood. After watching the video, Jing takes a sun-shaped icon with three branches. The first one at the left is for capturing anything on your screen, the middle one is to see your capture story, and the last one presents other options. Such options include your preferences where you can customize your account, a feedback section where you can send emails to the owners of Jing, a help center where you can ask questions about the application, and a finish and exit Jing button, which allow you to exit the option branch or simply to sign out from Jing.jing 1

To begin, decide whether you want to make a video or only a photo. Take a screenshot of what you want to present by clicking in the first branch of the sun. If you only want to take a screenshot of a photo, surround your image with the lines and then click on capture image. After this step, you are allowed to rename your screen capture, save it to you desktop, share it via your screencast account, and to upload it to the web. Then, you can go on your capture story by clicking on the middle branch of the sun and edit your image. You can add some text, frames, highlights, colors, and arrows to your picture, but, you can not add dialogue bubbles, which is unfortunate.jing 2

When taking a screenshot of a video, similarly to the photo capture, click on the left branch of the sun, surround your video with the lines, and click on the option capture video. Before doing so, make sure that you have access to a microphone. Then, you will have a countdown announcing when you will have to begin talking. Afterwards, the video will start and your voice and video will be recorded at the same time. Jing allows users to make a short video of five minutes maximum. Therefore, before recording your video, make sure that your video is five minutes and not more. When your screenshot of your video is finished, click on stop and your final product will appear on your capture story. You can directly go to Camtasia with it, or you can just save your video on your computer and send it to others in a MP4 format, publish it on YouTube, or you can share it via screencast. Text, arrows, frames and highlights can be added to your video as well. You can also go on Screencast and find your videos there. Finally, as said by Isaac A Wardell, a certified traffic geyser professional, Jing is a very valuable and easy screen capture application, it is a lot better than other image capture applications such as Adobe, where you have to take a screen shot, put it into Adobe Photoshop, crop your image, edit it, which were more complex steps. With Jing, the steps to capture your pictures or videos are really simple and straightforward, and they allow you to make a final product with visual elements that are useful to your presentation.

My experience

To begin, Jing does not offer the option of entering the application as a student or teacher. Thus, throughout my testing of the tool, I tried to keep an ESL student’s perspective of the tool even if it was not available on Jing’s registration.

As said earlier, Jing is very easy to use and is completely free. Thus, schools with computers could use this screen capture application as a teaching and learning tool. The tool is also very easy to access, you just have to download the application and register. When entering on Jing, the first thing I noticed is that it is widely accessible for all people of different ages, from elementary school students to students in CEGEP, and that there was a lot of documentation presenting the functions and steps of the screen capture application. Therefore, students will not waste a lot of time trying to comprehend the options of Jing because of the support and ease of use.

Furthermore, Jing’s homepage is also very simple, all important sections are clearly identified and accessible. Also, Jing can help ESL students to practice their overall knowledge of English since the tool is only available in this language. By recording their voice or by writing a text on a photo or video, ESL students can exercise their oral and writing skills in English.

What I found of most interest is that Jing could be used in flipped classroom. Teachers can record themselves teaching the subject of the class and send it to their students by email.  Instead of teaching the lesson over and over again, teachers will simply have to go on their capture history, take the video that they did, and present it to the new class. This technique saves time and effort to teachers since they do not have to create the video again, it is already saved in their Jing account. Thus, the class contents are learned through these Jing videos and students have more time to make their homework with the teacher’s help during the class, which is in line with James Gill’s presentation of Jing.

In my opinion, Jing is a very important and useful tool for teaching and learning a second language for all students’ proficiency level. Jing can be presented to students at a beginner level and to students at an advanced level since they will all benefit from it. Students all have access to the same options; therefore, the benefits of the task will always depend on its ease or difficulty.

Use in ESL teaching

As previously mentioned, Jing can be used for all English proficiency levels. Therefore, students with basic English and students with advanced English can both use this application. For instance, ESL teachers can use Jing to ask students to reflect on a class subject. If the class subject was the history of English, students can create a short video by presenting screen capture images or video and commenting them. By doing so, students practice their oral English, but they can also practice the simple past tense by reporting on facts, their formulation of English sentences, and they can also practice the different accents ( e.g. British English) and types of English ( e.g. Old English) throughout their video.  This type of activity will be acceptable for more advanced English learners like students from CEGEP.

Moreover, for beginner English students, especially for elementary students, ESL teachers can use Jing for storytelling activities. Students can create a story by screenshotting images and editing them with text, frames and arrows to tell their story. In this way, beginner students will improve their writing skills by including some new vocabulary in their story, by practising grammar rules such as the possessor “s” and the third person singular “s”, and by creating sentences with the correct English word order. If teachers want to make this activity more challenging and beneficial for students, they can ask their students to create a story using the video capture option. In this way, students can improve their writing skills as well as their oral English skills by recording their voice. With this option, students practice their pronunciation of English words as well as their spoken fluency.

Maria Spelleri, an Instructor in the Department of Language and Literature, uses Jing especially for role plays. First, students are assigned a role and they have to complete the task by using Jing to take some screen captures of their character, what they do, and what they say.  With this type of activity, students develop their oral speaking, especially the suprasegmental features of English (tone, accent, vowel length…) and the formulation of present tense sentences, as well as their creativity.

Another ESL teacher and technology support specialist named Aly Tapp uses Jing but not specifically for activities.She mostly uses Jing for giving feedback to students on their work and for making the grades. For instance, she goes on student’s essay, screen captures sections of the essay that need improvement, clicks on capture video, records her voice to explain what the student have to change in his/her essay, and adds some visual element such as arrows to be more specific. This strategy for correcting students’ essay is really useful and saves a lot of time. it only took 10 to 15 minutes for Aly Tapp for grading each paper; it is much less longer than meeting each students one by one to explain their errors. Students from Aly’s class responded with a positive attitude towards this correcting strategy. She noted that “[…] most students LOVED the feedback and were eager for more.” Thus, Jing benefits both teachers and students in many ways.

All in all, I recommend Jing for ESL teachers because the possibilities are endless with this tool. ESL teachers can use it for flipped classrooms, for correcting assignments, for making grades, and for an infinite number of activities that can benefit students from all proficiency levels. More importantly, this screen capture application is a wonderful learning tool that students can use to develop their English writing skills, such as grammar, syntax, and vocabulary, their English speaking, such as accent, pronunciation, and different English dialects, and their listening skills by listening to teachers on videos. Finally, Jing is a simple but essential tool in ESL classrooms.

 Video

Here is my attempt to use the tool. I have made a video explaining an activity that students can do with the tool. So, I found a video on YouTube, screen captured it, recorded my voice, saved it on my history, and uploaded it to Screencast. The audio is a little bit difficult to understand since I had a little problem with my microphone.

http://www.screencast.com/t/d9dVOrXIo

First, I found a video on YouTube and screen captured it. jing video


Then, I recorded my voice.jing video 1

Finally, I saved it and uploaded it on Screencast.jing video 3